Important:
- Only users that were added into the Greetly Portal through Azure sync can be removed via Sync, if they are removed from the Azure User group. If the users were added into the Greetly Portal manually (Bulk Upload), they will not be affected.
Creating the App Registration
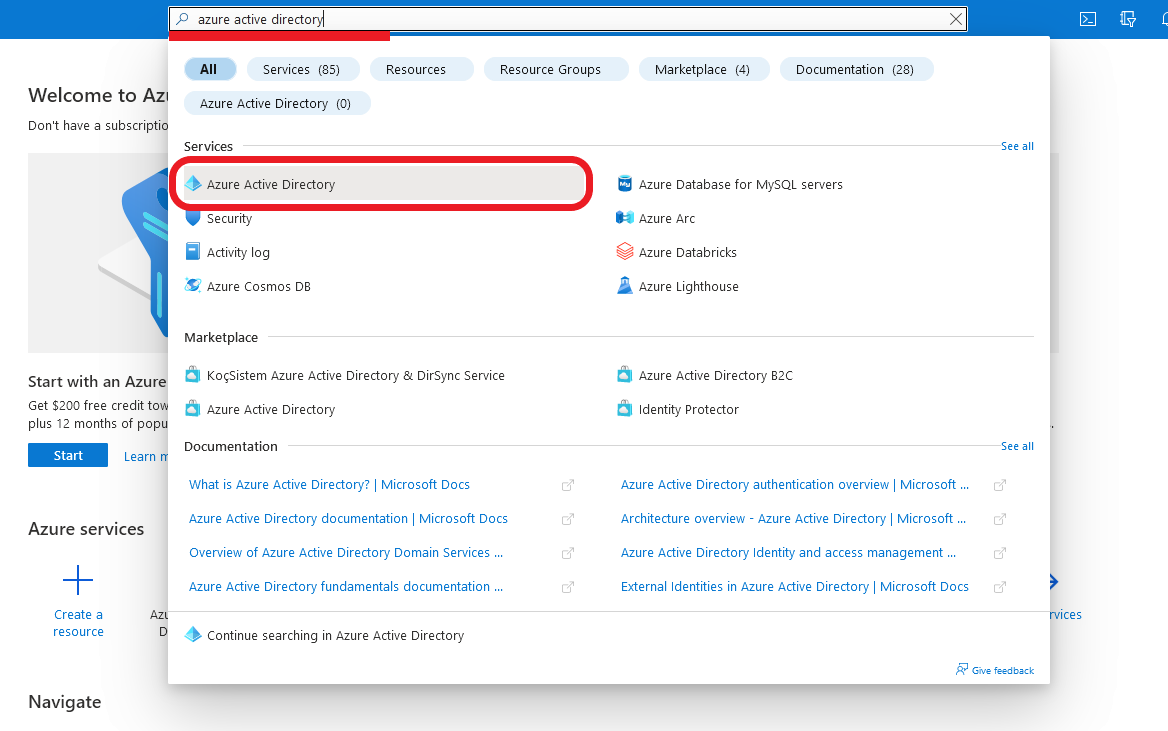
To start, open the Azure control panel (https://portal.azure.com/#home), and navigate to the Azure Active Directory page.
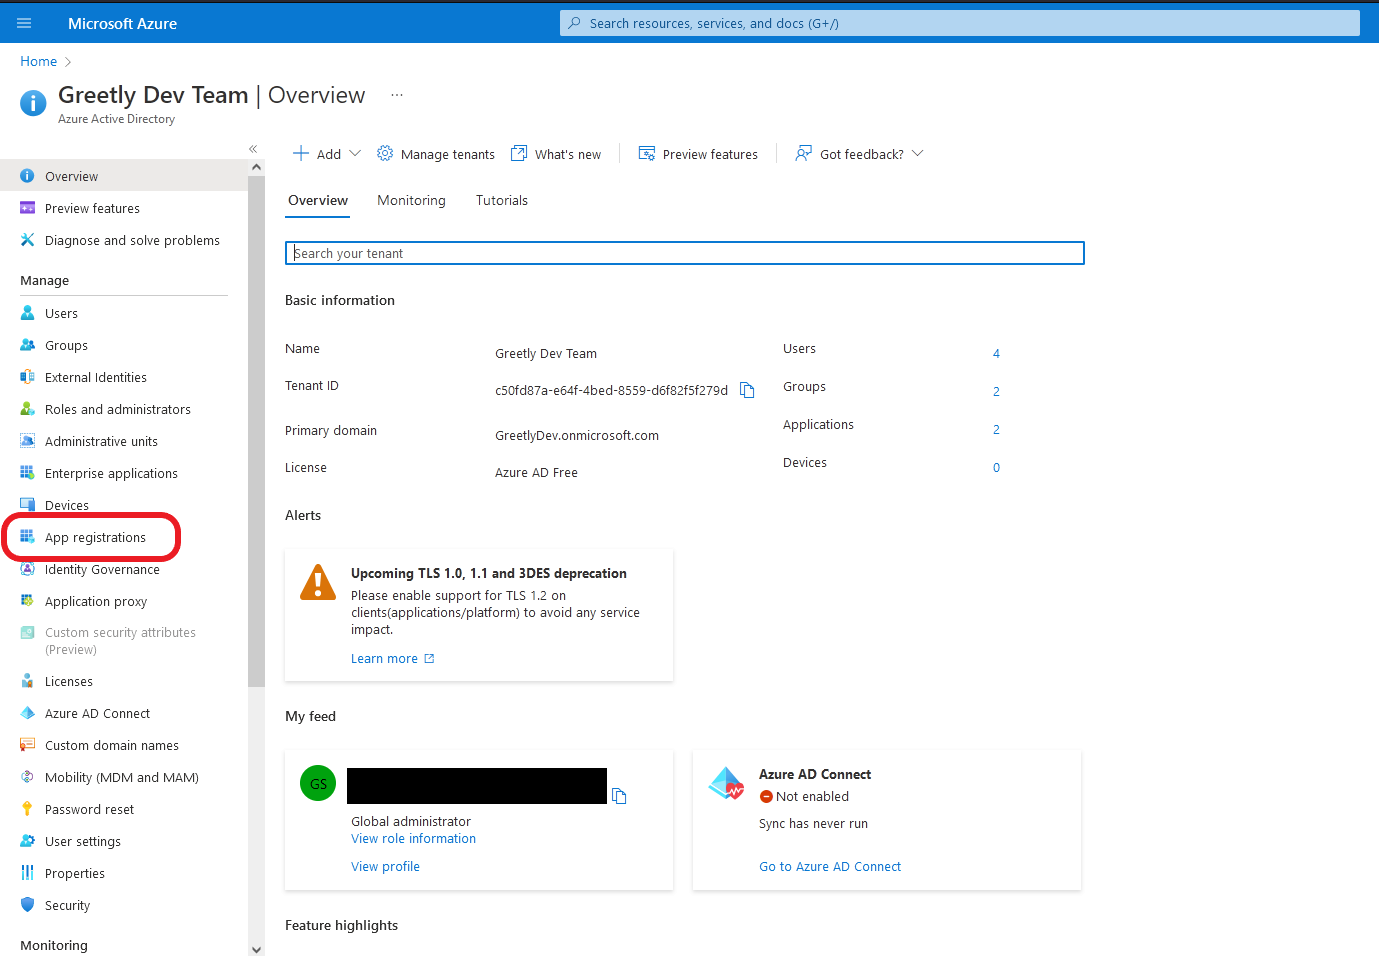
From your Azure Active Directory dashboard, navigate to App registrations.
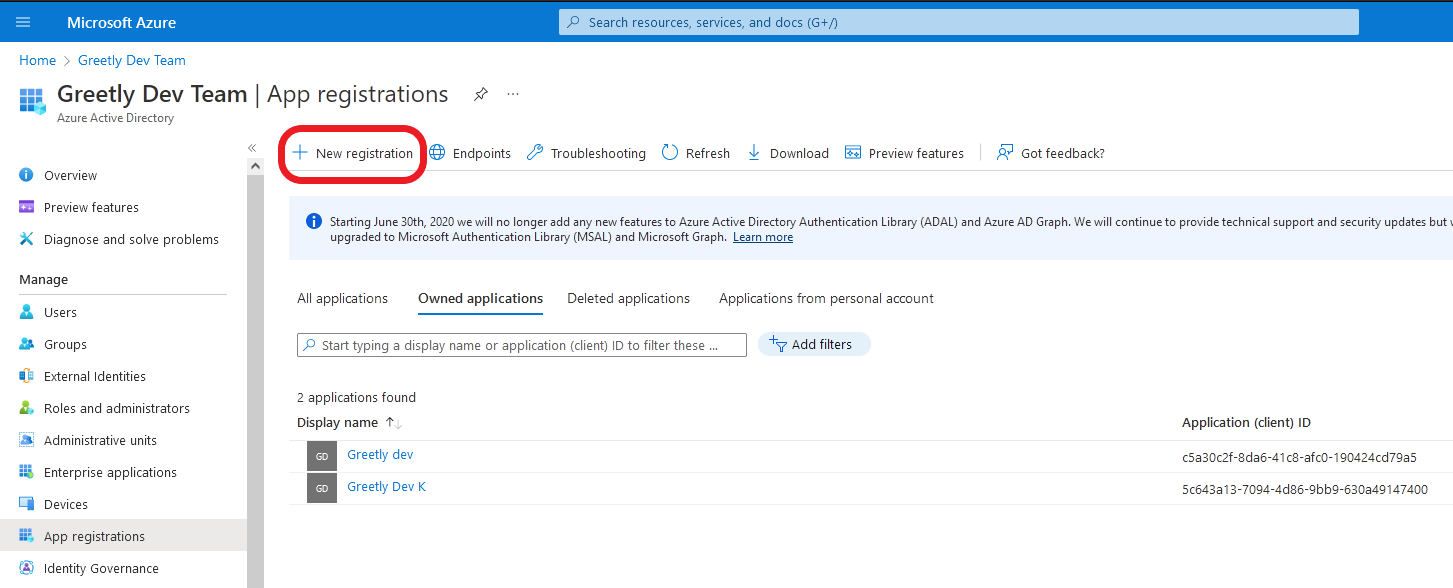
From here, create a New Registration.
After you click you should see a page similar to the one below.
- You may name this application whatever you like. In our example, we chose “Greetly Azure sync demo”.
- Make sure that the account type is set to the single-tenant account type.
- Set the redirect URI type to the web, and paste the following URL into the neighboring texting field: https://app.greetly.com/oauth
Click on Register once you’re finished.

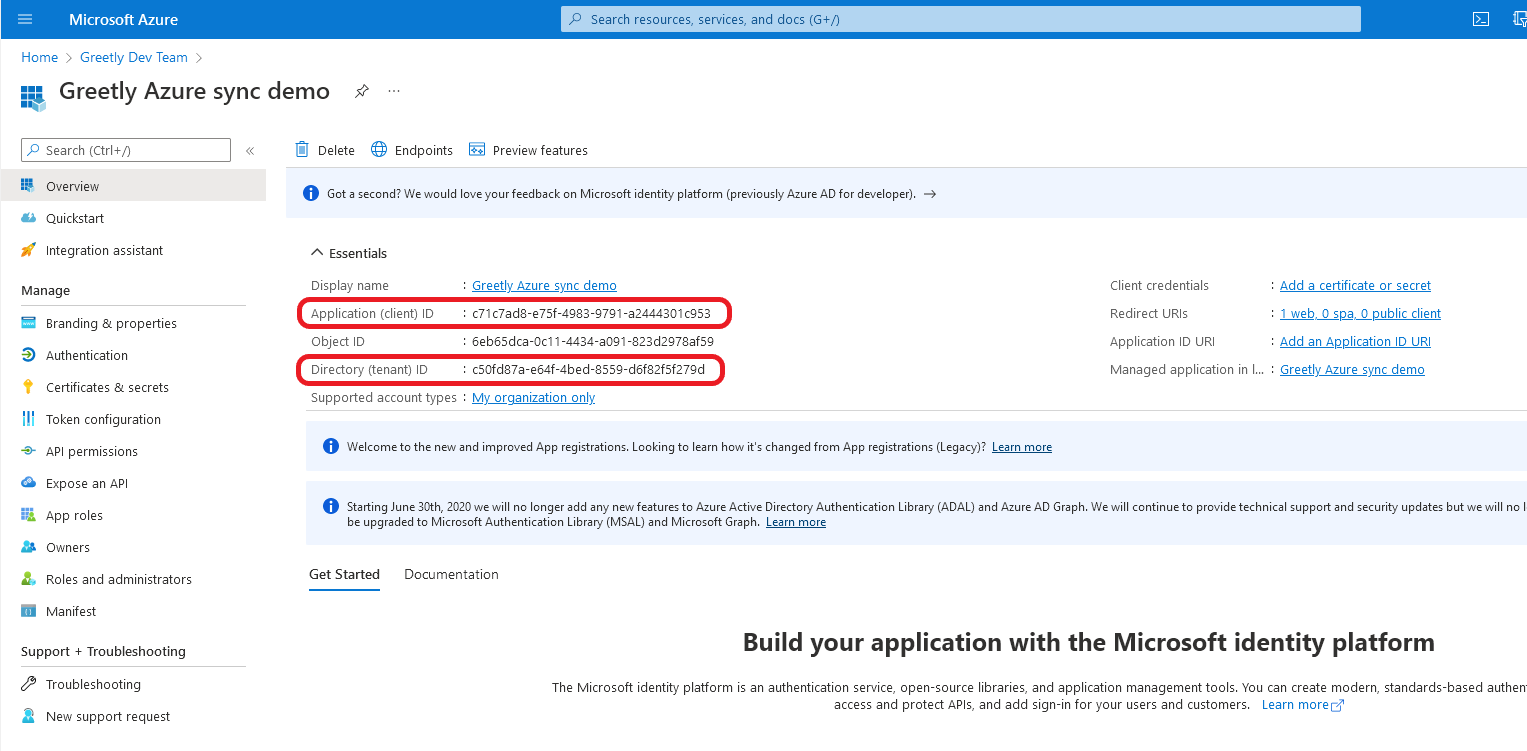
You should be redirected to the page below. Copy and label in a text file:
- Application (client) ID: [your Application (client) ID]
- Directory (tenant) ID: [your Directory (tenant) ID]
You’ll be using these later.
Creating App Registration Client Secret
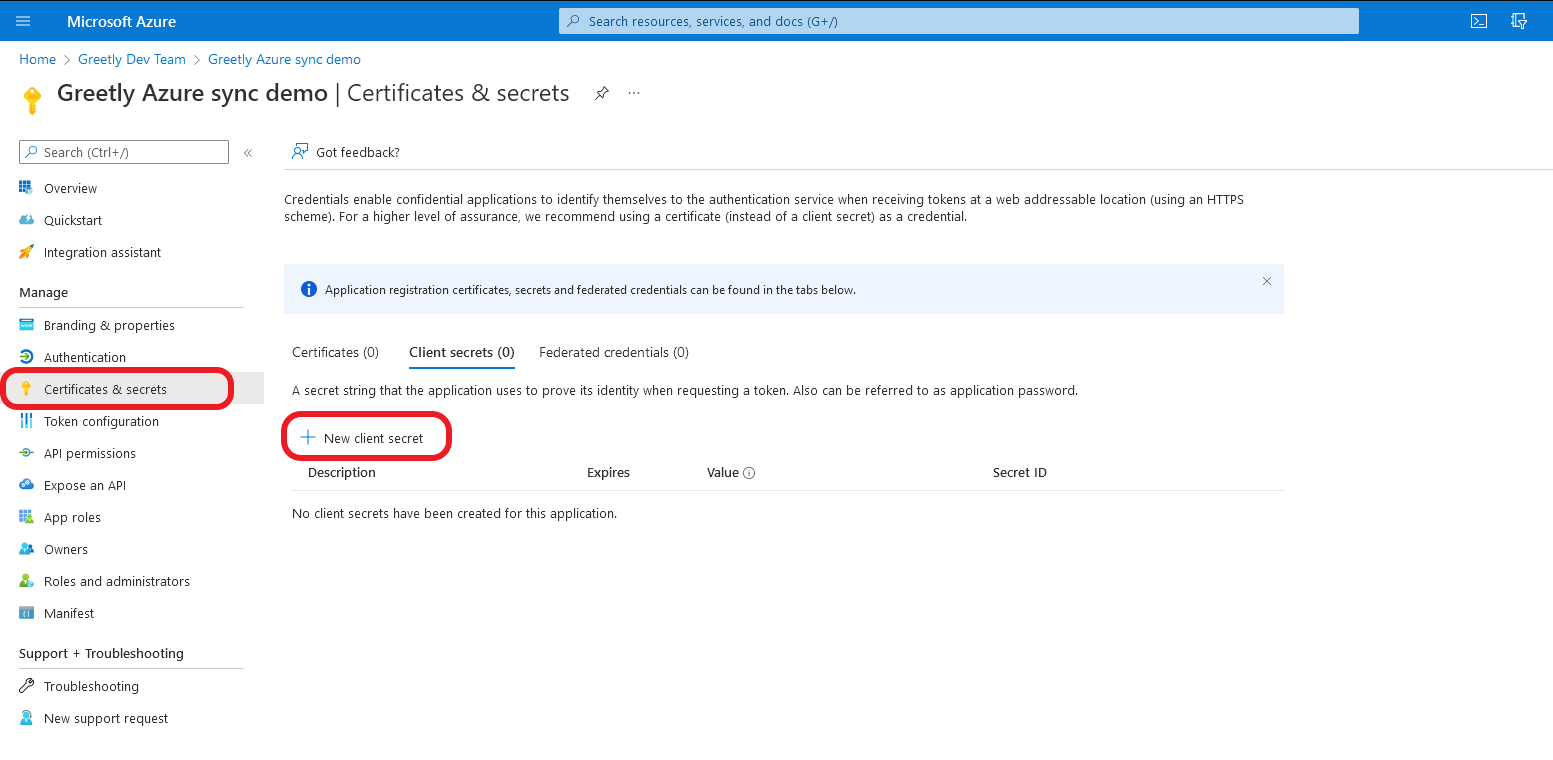
From the previous page, navigate to the Certificates & secrets page, then click New client secret.
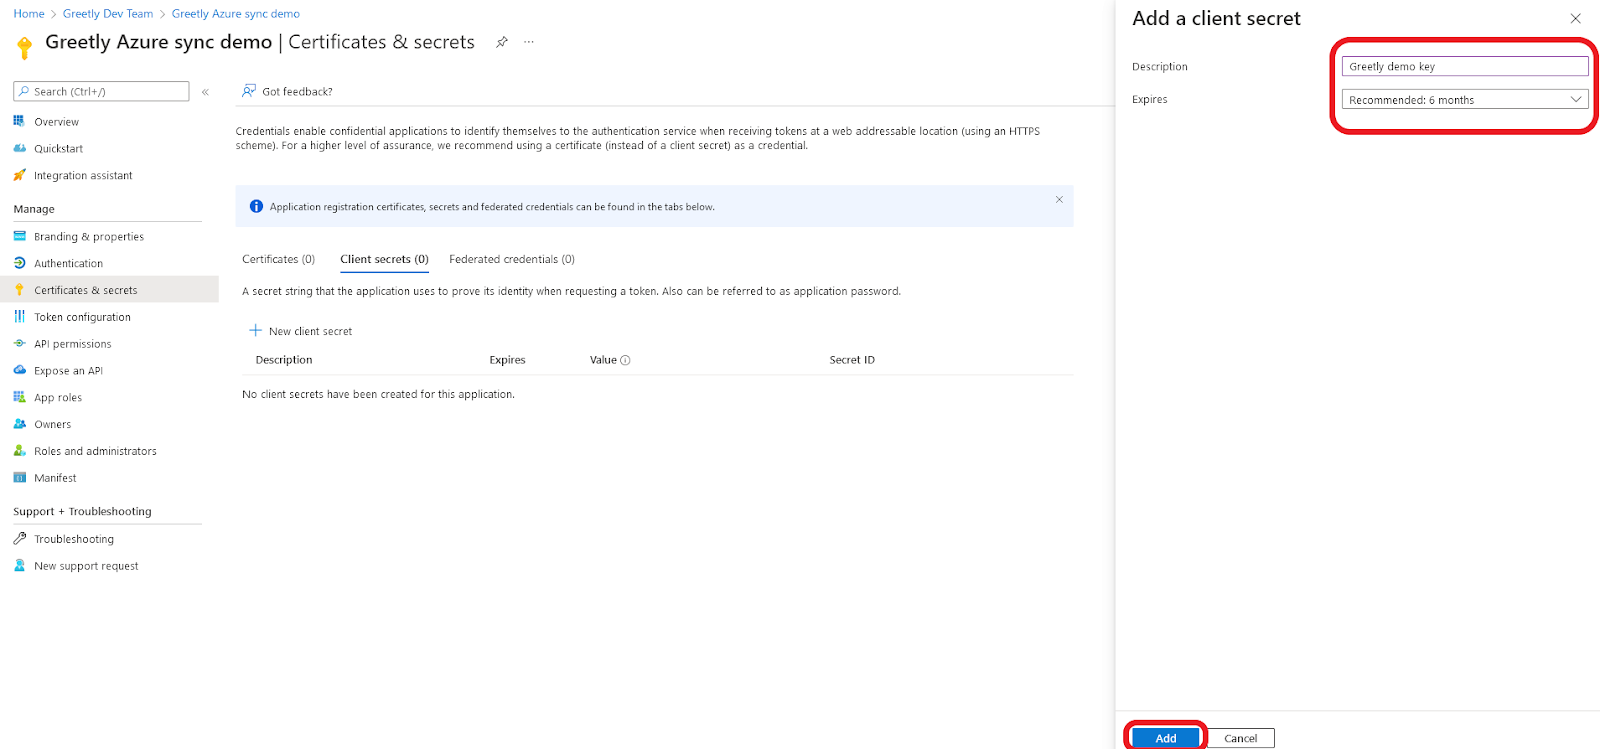
Please note the Certificates and Secrets client secret must be set to Recommended 6 Months only and that the Value is copied over into the Private Key in the Greetly Account Settings page
[Set a reminder in your calendar for 5.5 months Time to renew your Azure certificate]
You may name the client secret however you like. Make sure that the key is set to expire once every 6 months.
Click Add to create the key.
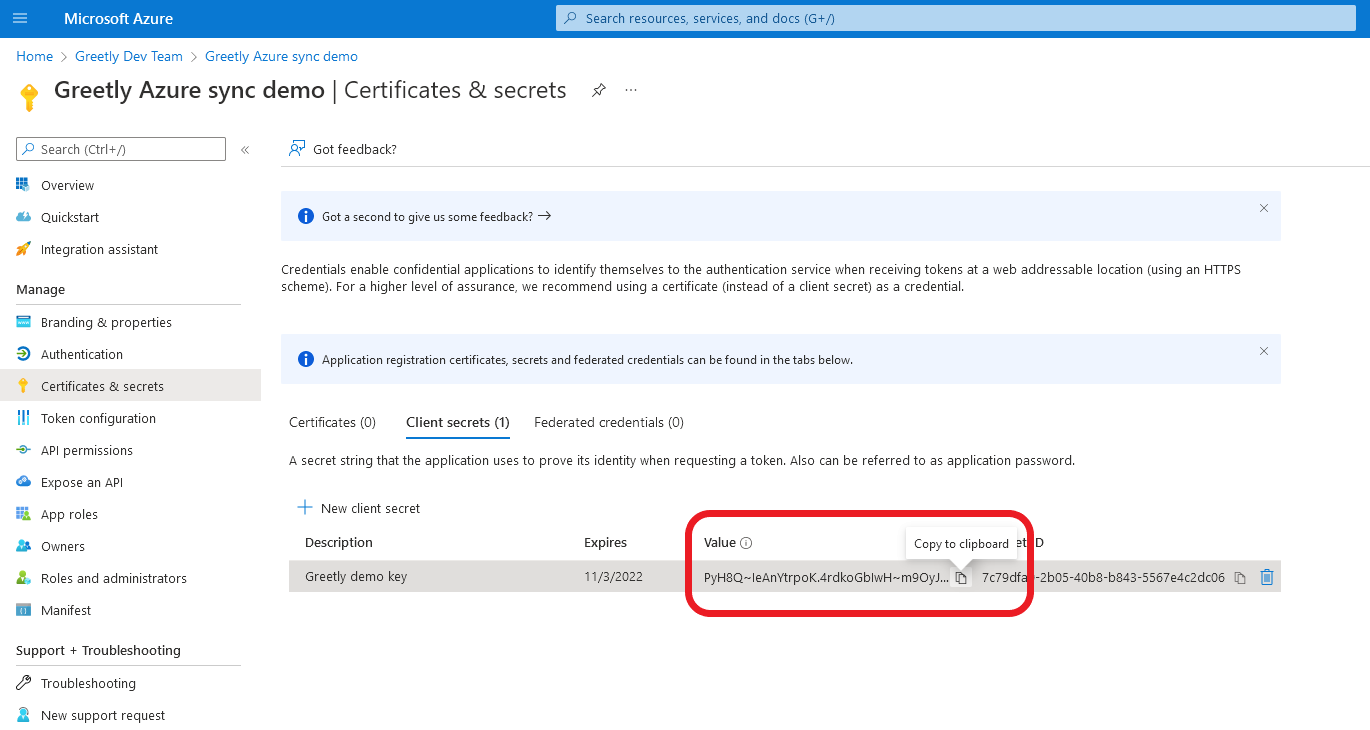
After you create the key, you should see it on the client secret list.
Copy the key value and paste it into the same text file where you’re keeping the tenant ID and application ID.
You will not be able to view the key-value after you leave the page. If you lose the key value, delete the key you just created and make a new one.
- Be sure to set a 6-month reminder to refresh the key. The integration will not work after the key expires.
- For instructions on how to refresh the key, visit our Azure sync refresh key documentation.
Getting User Groups to Sync
Important
- To set up the integration for multiple locations, you must follow the procedure below for each of your locations in Greetly.
Navigate back to your directory. You can do so by clicking the link outlined in red. Alternatively, you can reach it by searching Azure Active Directory in the search bar and clicking the associated result.

From the directory overview page, navigate to the Groups page.

Note the Object ID of the group that you wish to sync. In our case, we’re syncing Security Dev Test, so our Object ID is 294c4a09-490f-430d-a4f8-ee5afeba90ed. Add this to the text document where you’ve been storing all the other information, we’ll be using this later.
Greetly only supports syncing Security groups at this time. Other groups types will not sync.

Setting Up Sync in Greetly
At this point, you should have:
- An object (group) ID
- An application (client) ID
- A directory (tenant) ID
- A client secret
First, navigate to the Greetly Web-Based Admin.
Select your name in the top-right corner of the screen.

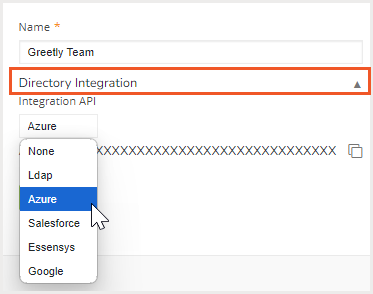
Then, click the Directory Integration dropdown and select Azure.
Then Save.
Using the text file from earlier, fill in the text fields.
- The directory/tenant ID goes into the Azure directory id field
- The app/client ID goes into the Application id field
- The client Certificate and Secret value goes into the Private key field
Once you’re done, click Save.

Next, go back to the Greetly Web-Based Admin > Location Setup

Paste your object (group) ID into the Location ID text field, then click Save.

Activating Azure Sync
First, navigate to the Manage Users page.

Then, select the Sync from Azure button in the top menu.
![]()
You should see new users populate within a few minutes.