Want to create a custom badge builder for your custom workflow? Achieve this goal with Greetly!
Please note that you can only customize the badge builder for Custom Check-in buttons in the Workflows > New (beta) section.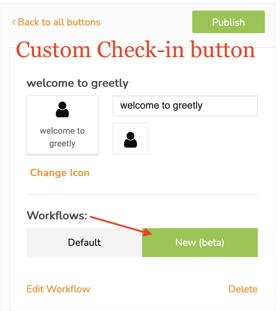
You must be a Global or Location Admin logged into your web portal account to access this feature.
Customizing Badges from a New Custom Workflow
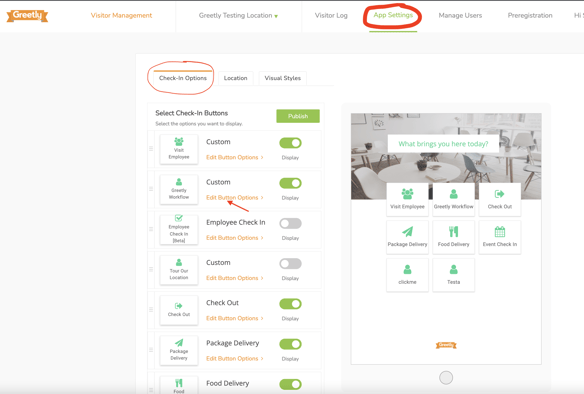
Click on App Settings.
Click on Check-in Options.
Click on Edit Button Options.
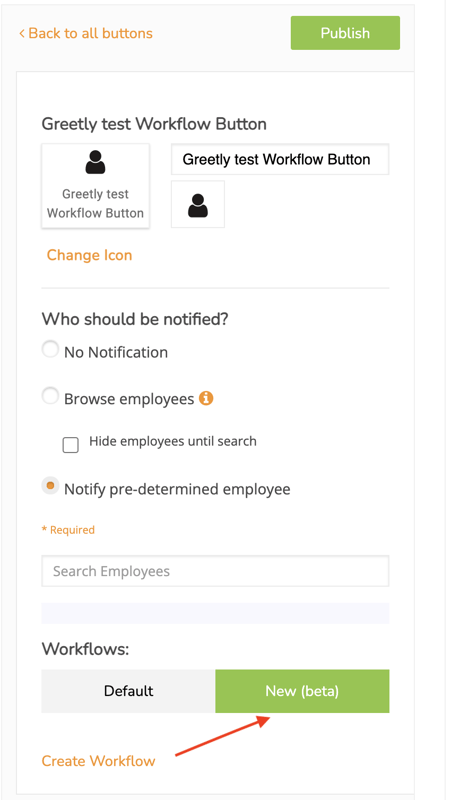
In the Workflows section, click on New (beta).
Then click on Create Workflow.
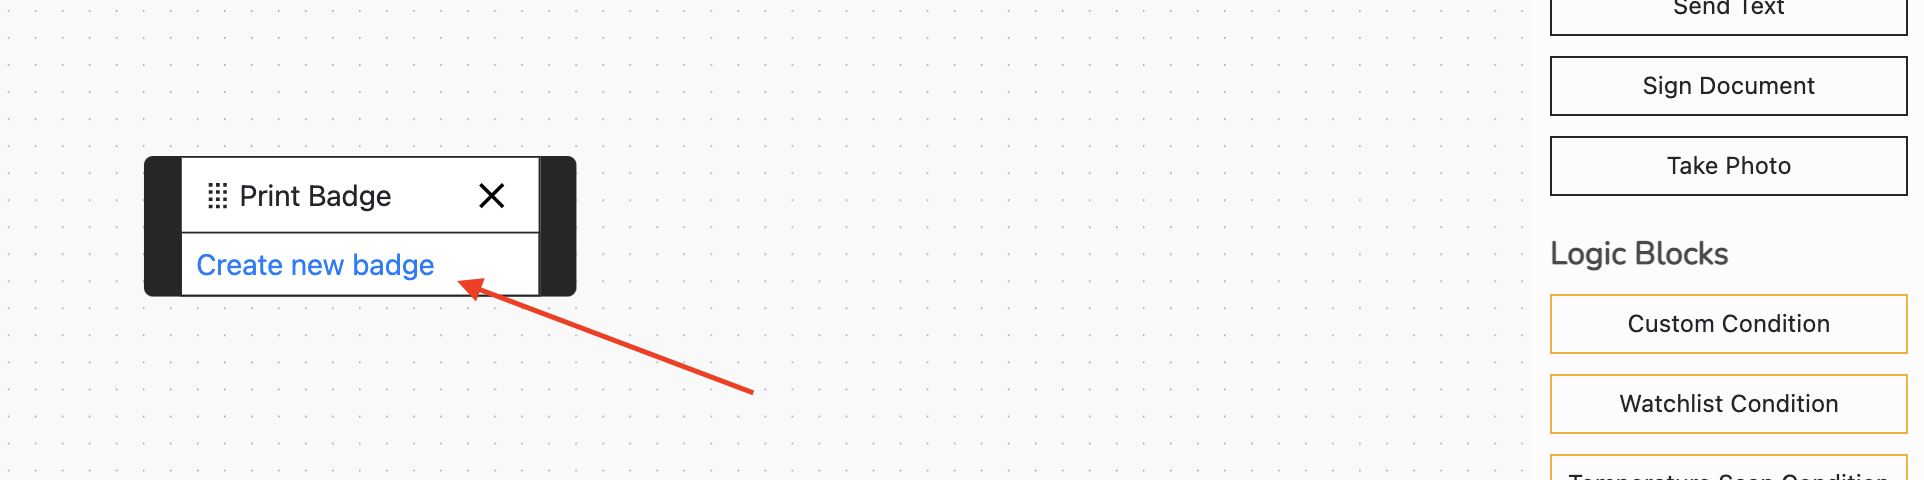
Select Print Badge for your first block and drag it to the pane.
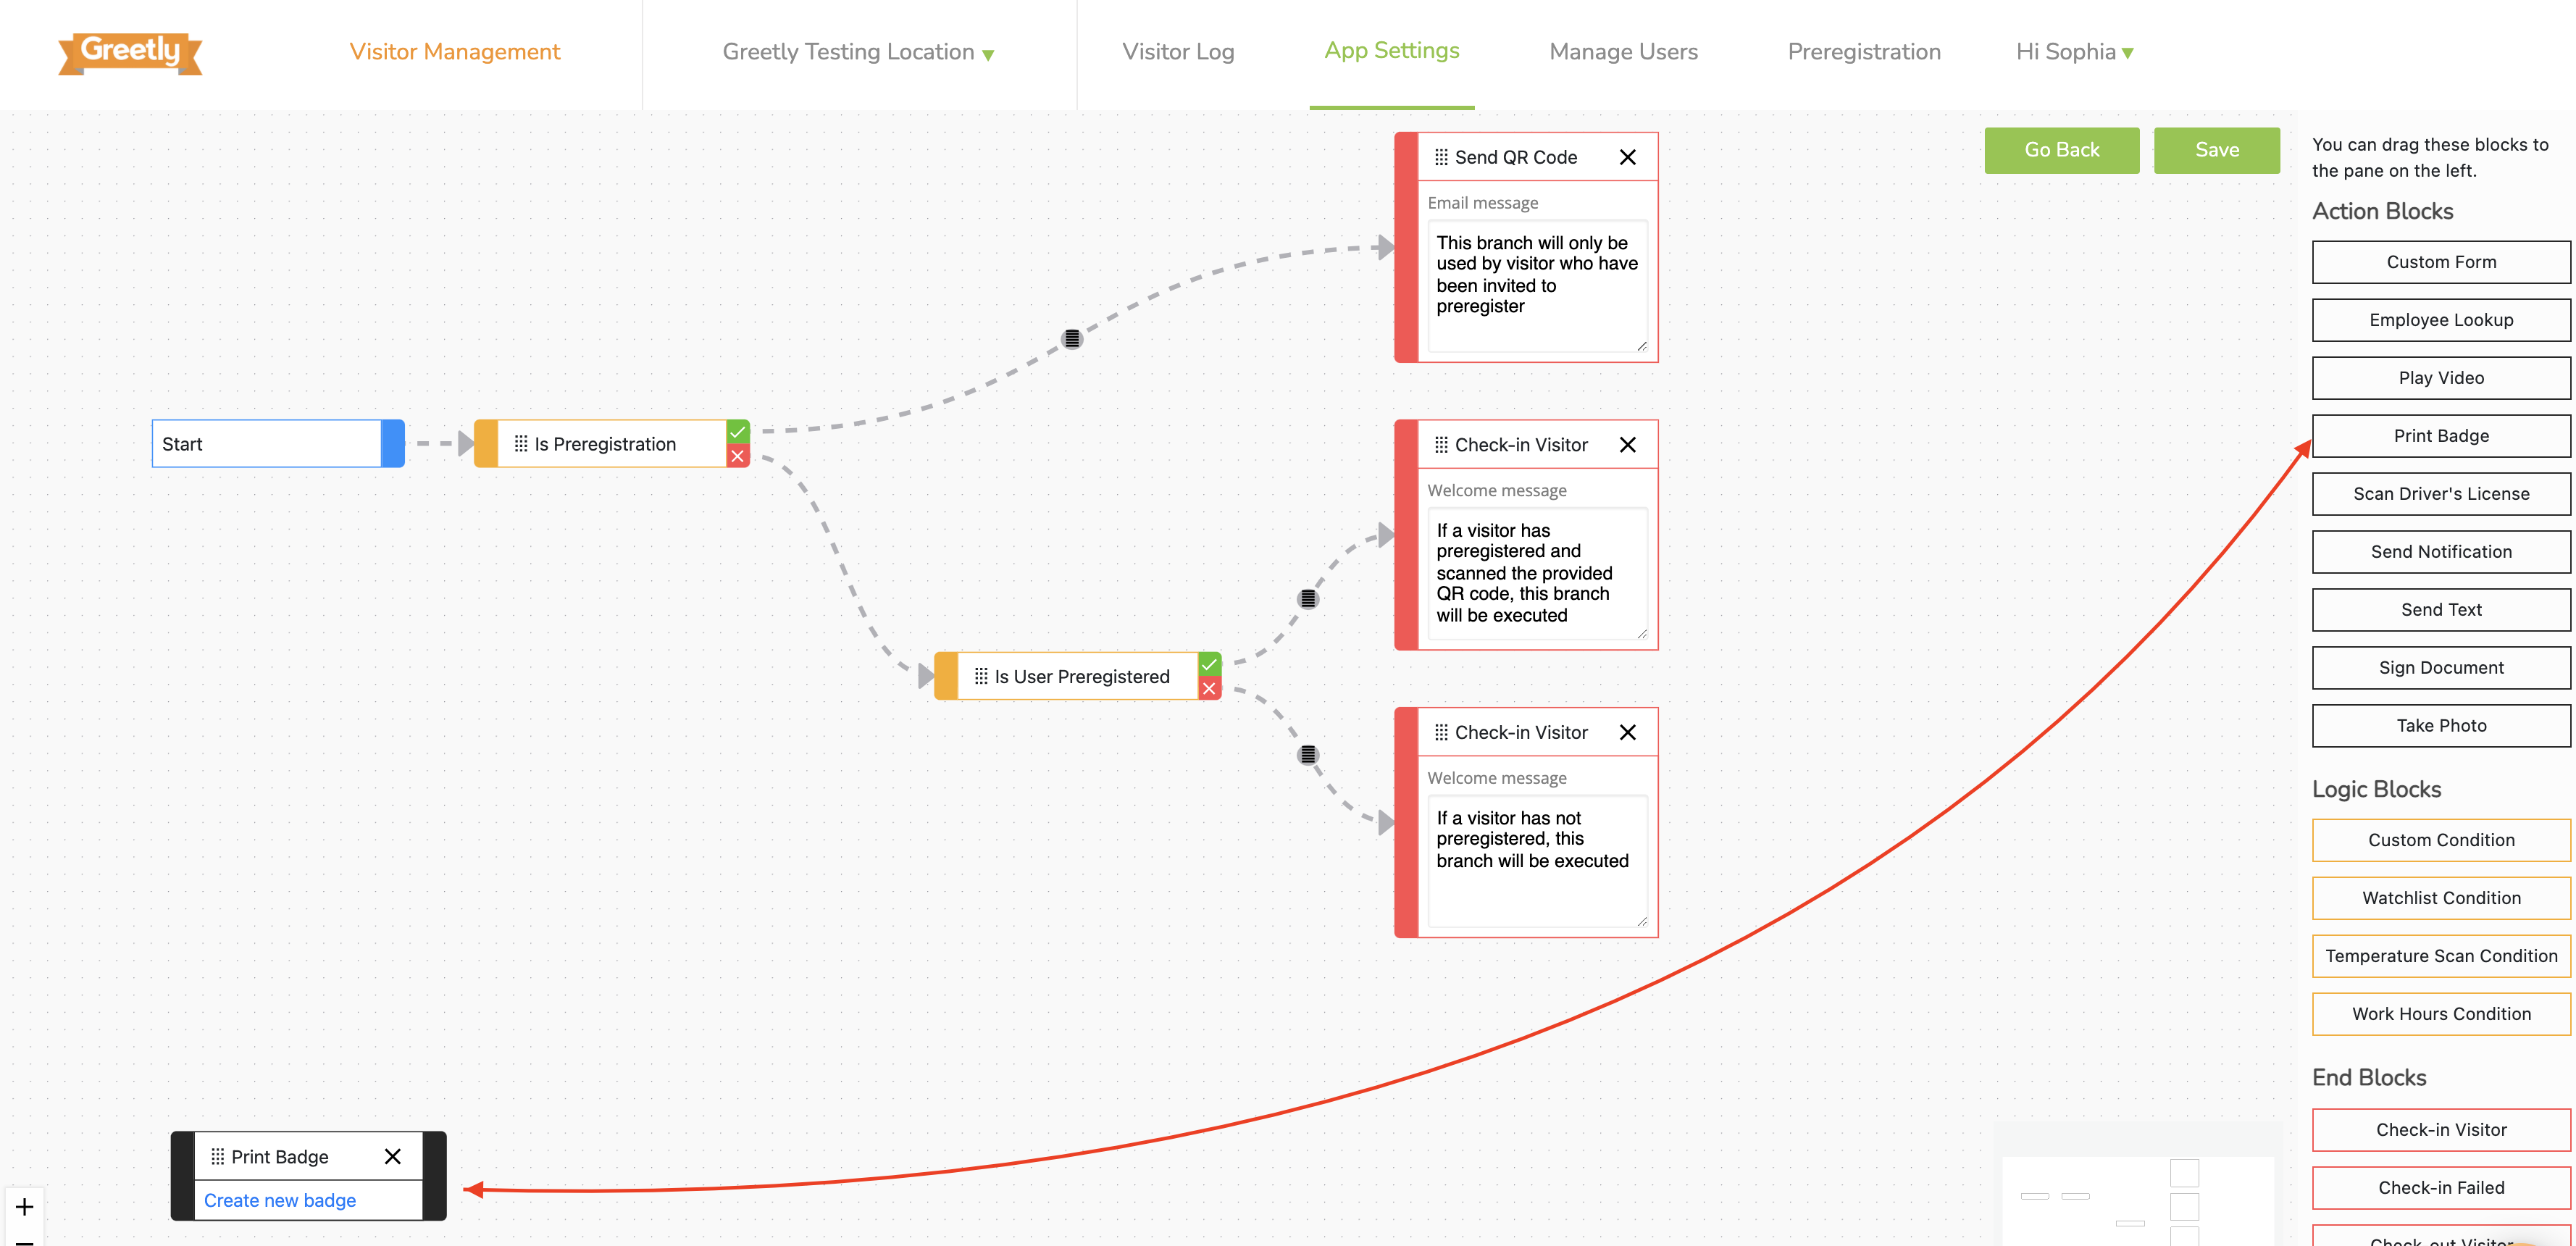
Click on Create new badge.
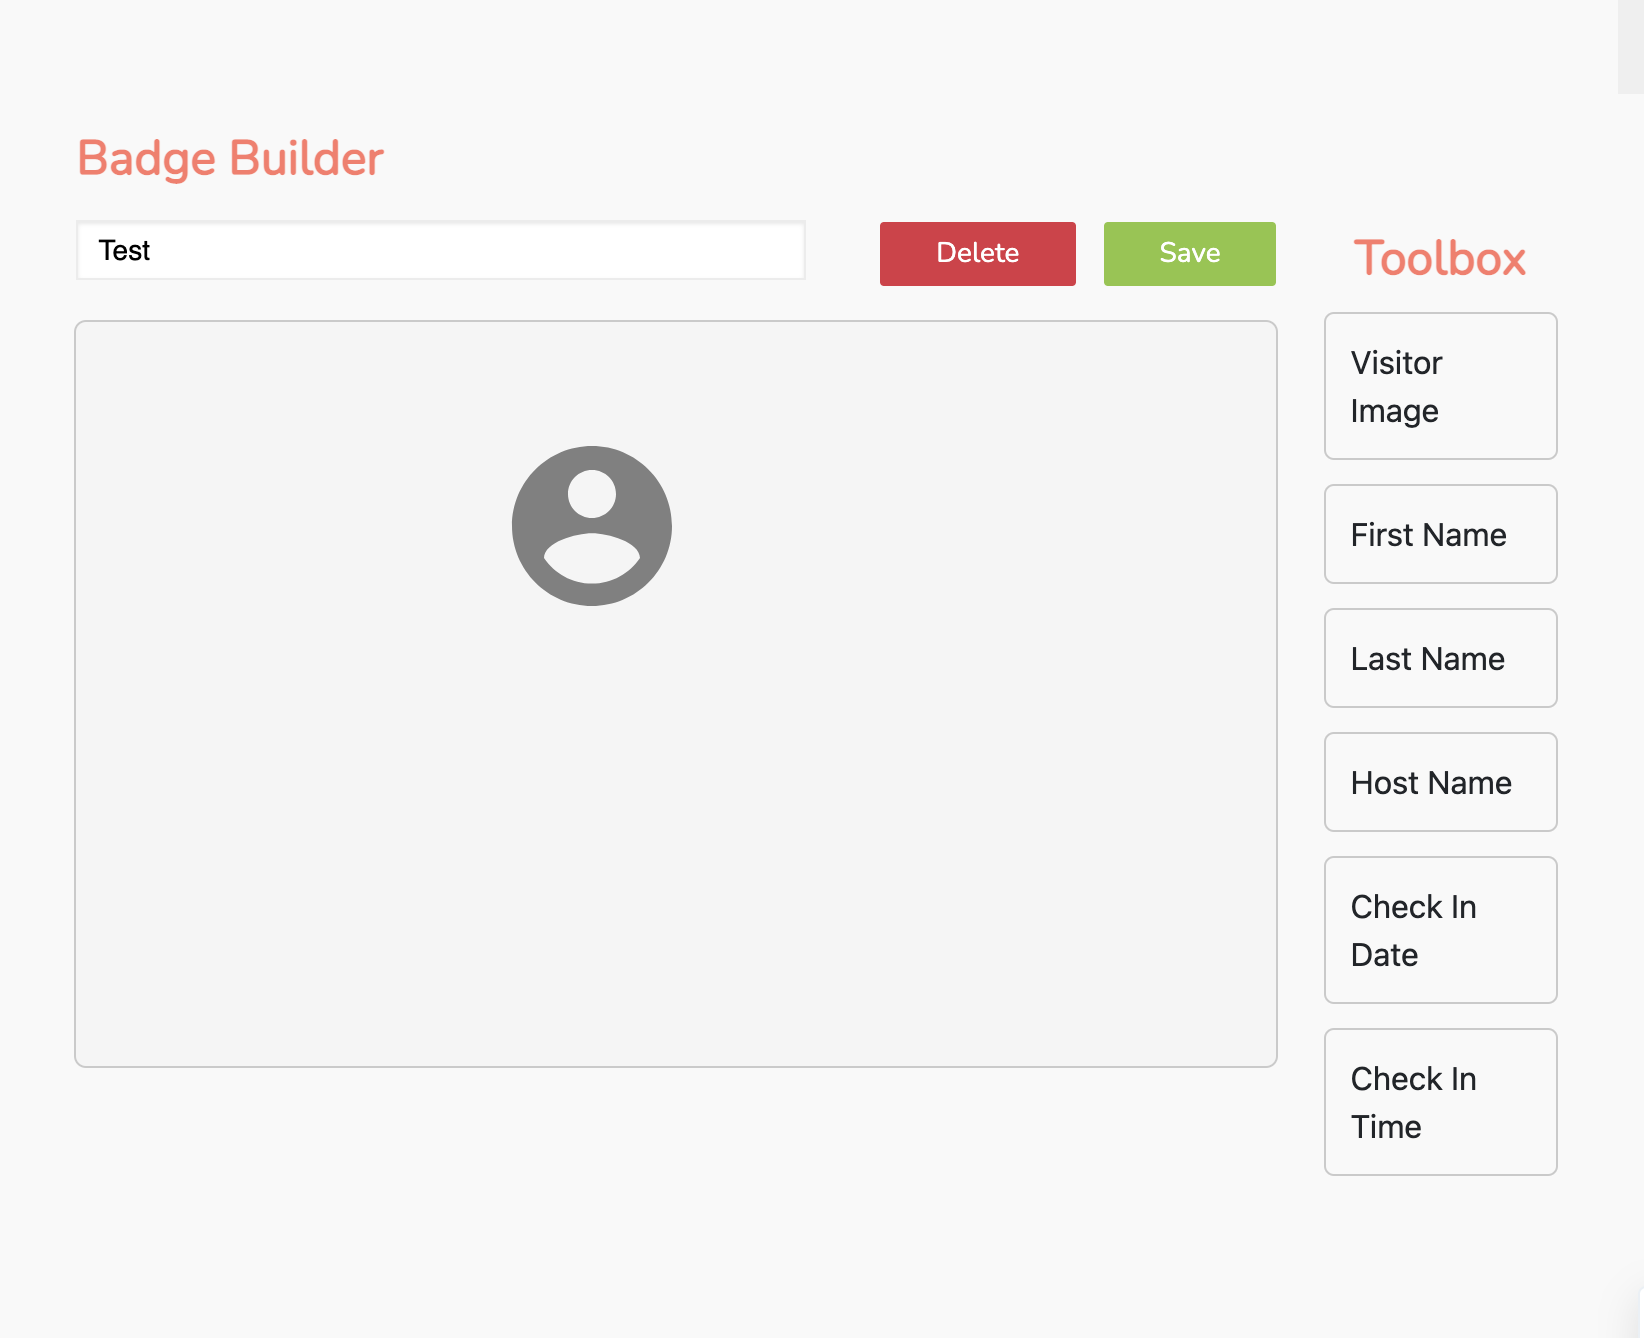
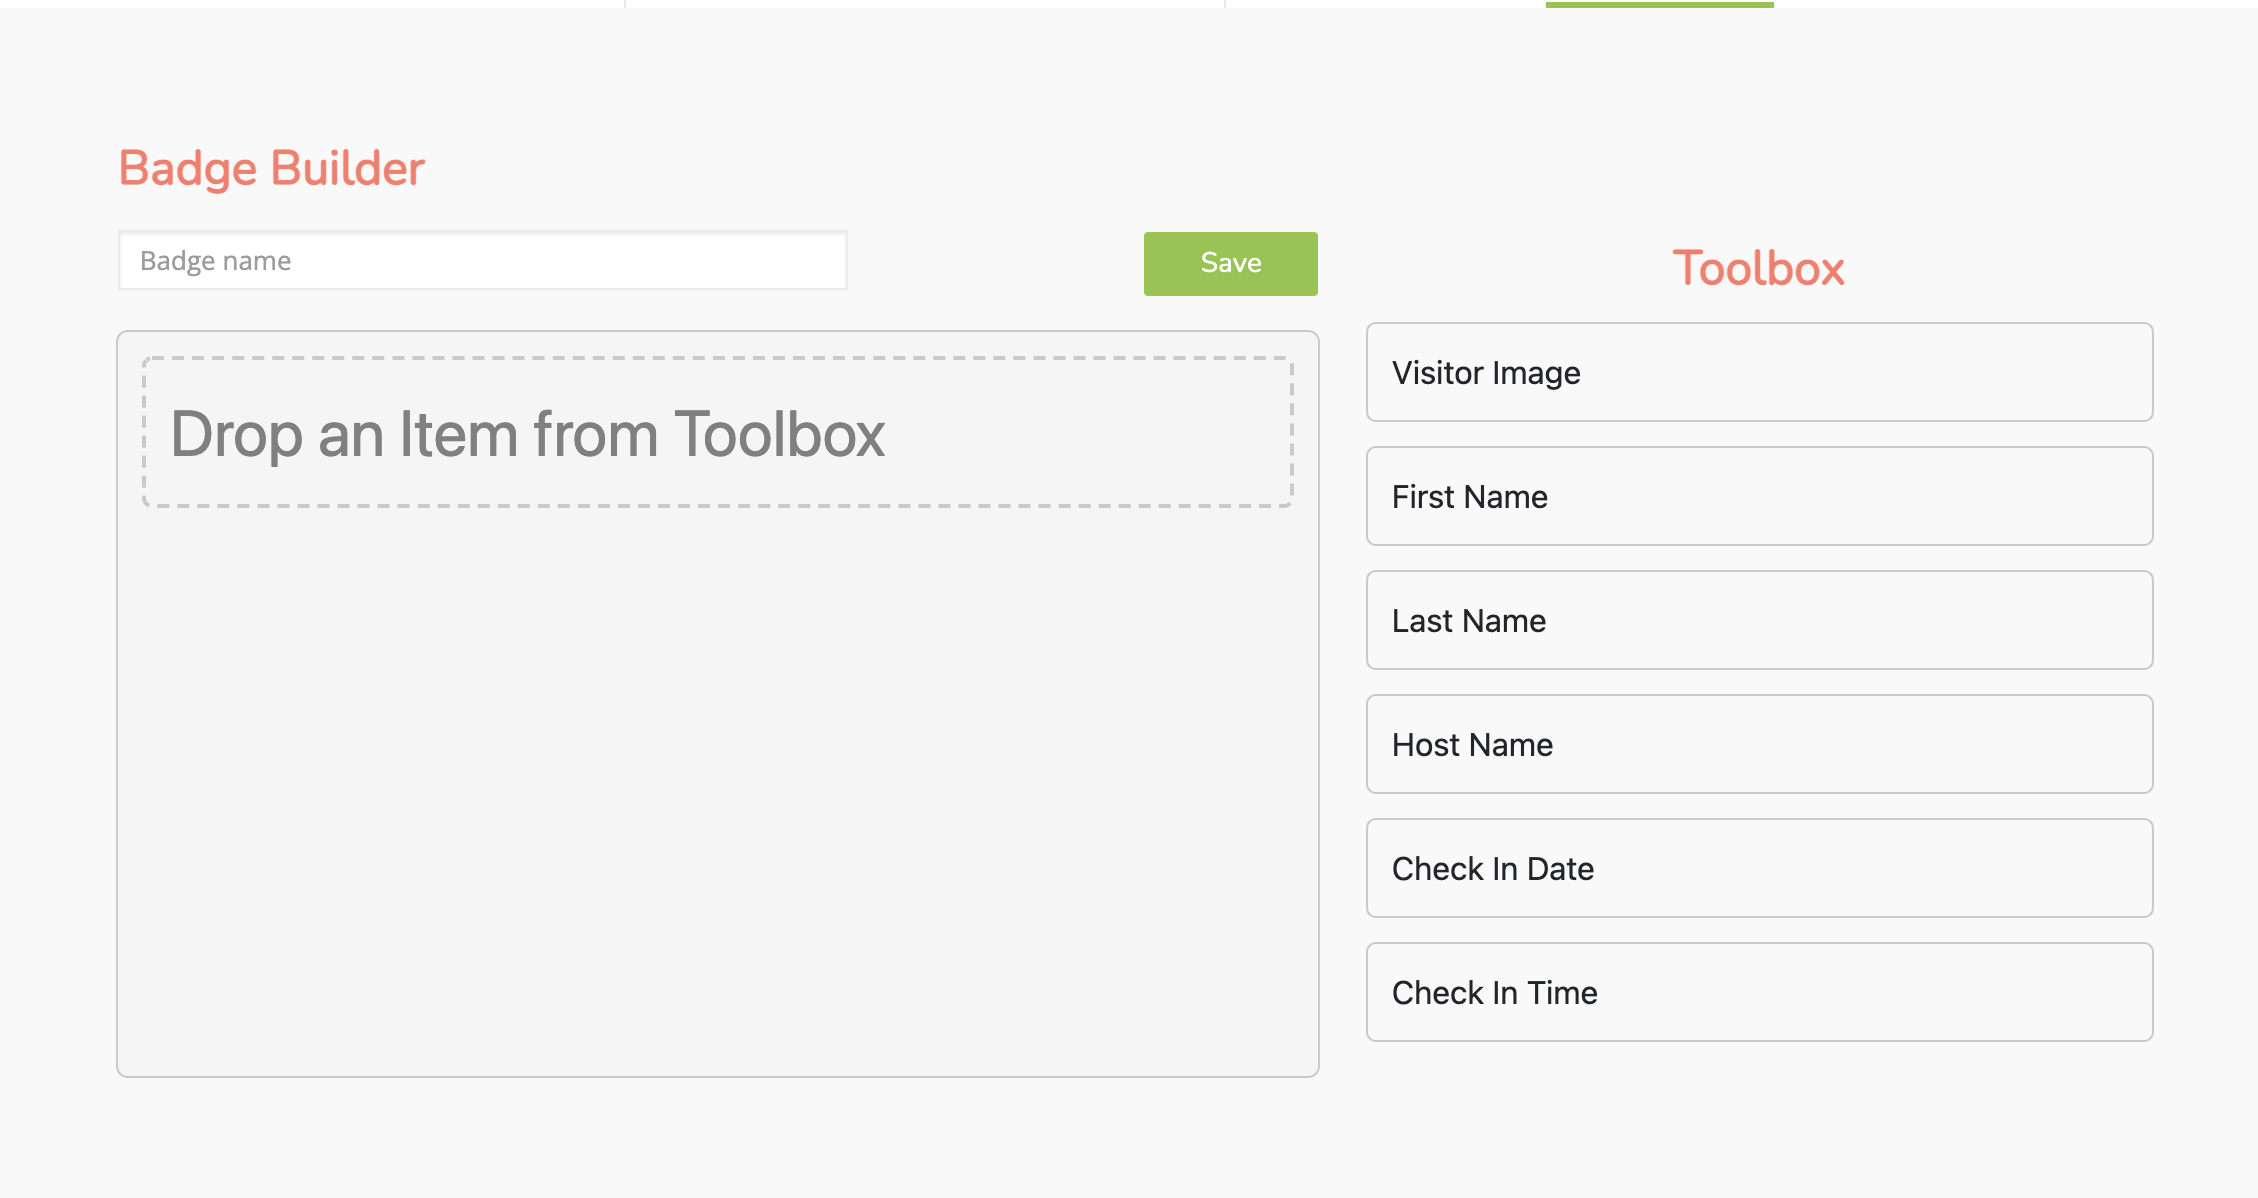
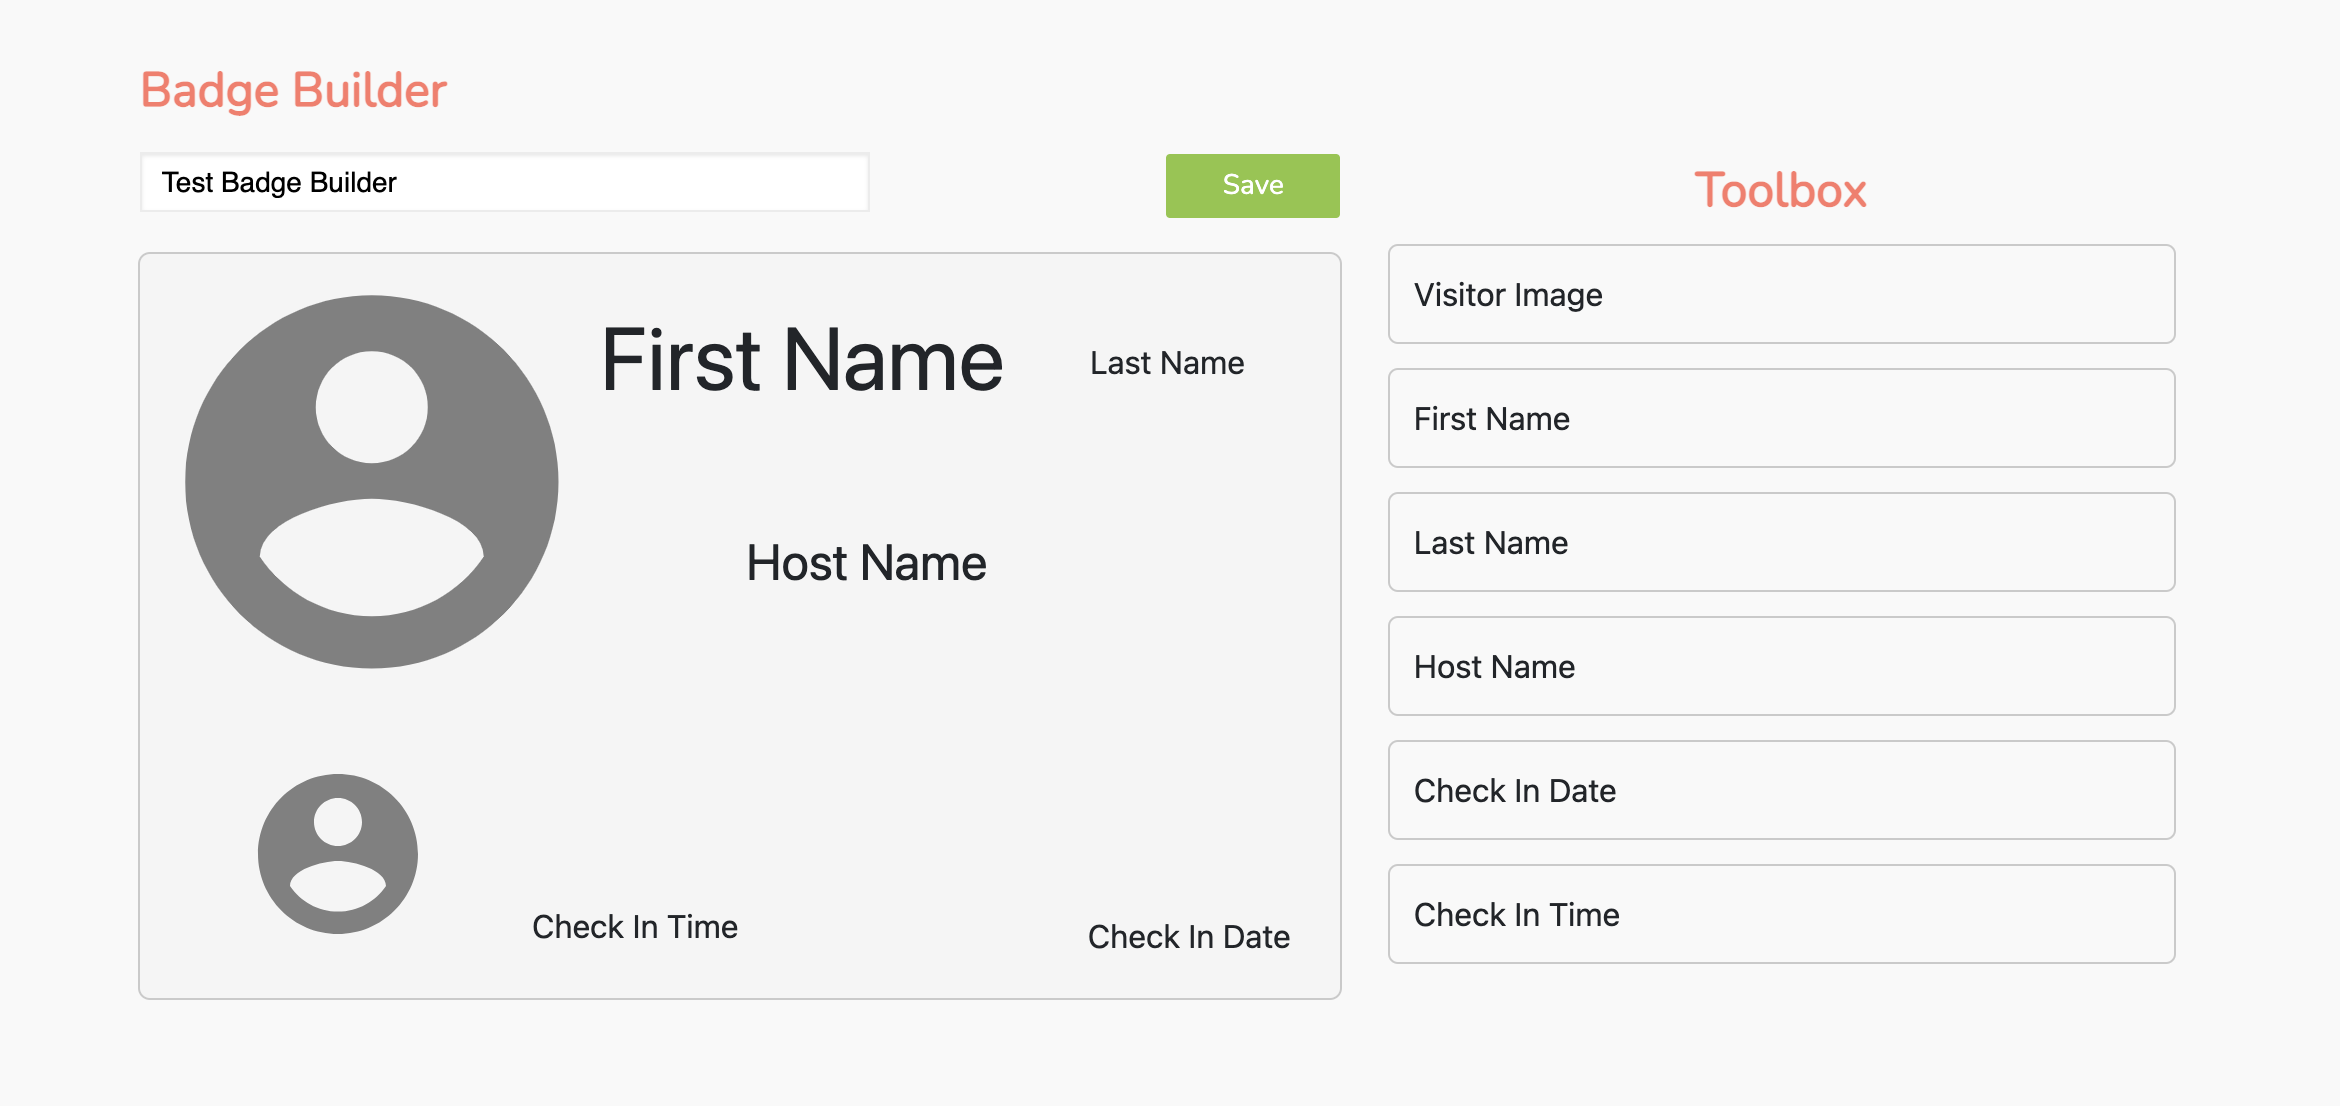
Name your badge builder.
Next, drop and drag the information you want to be displayed on the badge from the Toolbox section.
For example, you can add the visitor’s check-in ID to the badge, guaranteeing that each badge has a unique number, which cannot be reused.
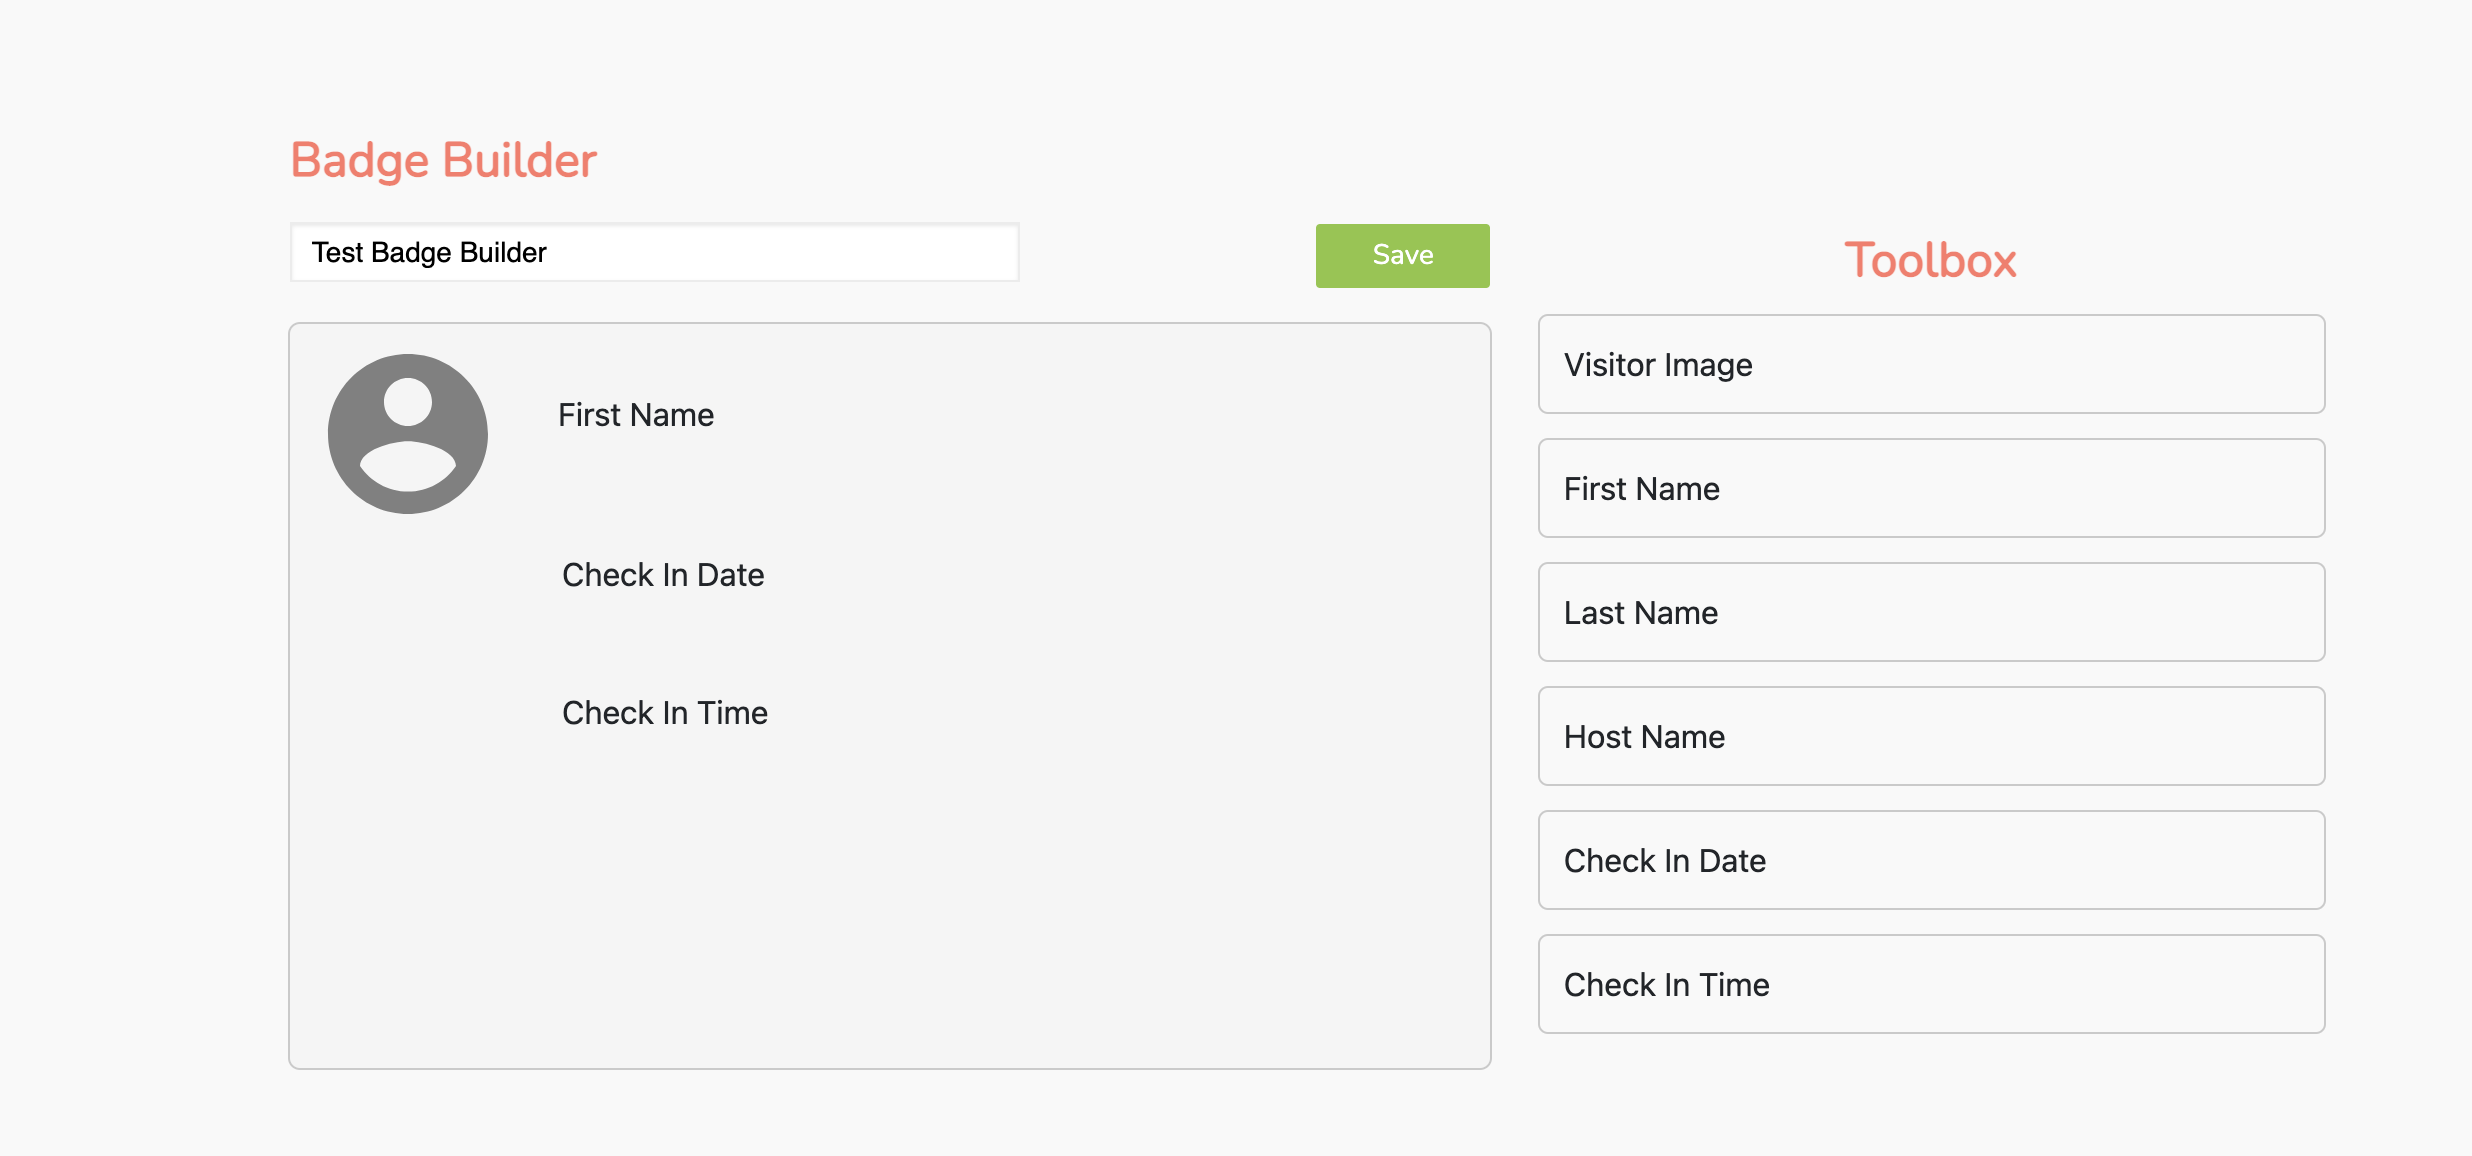
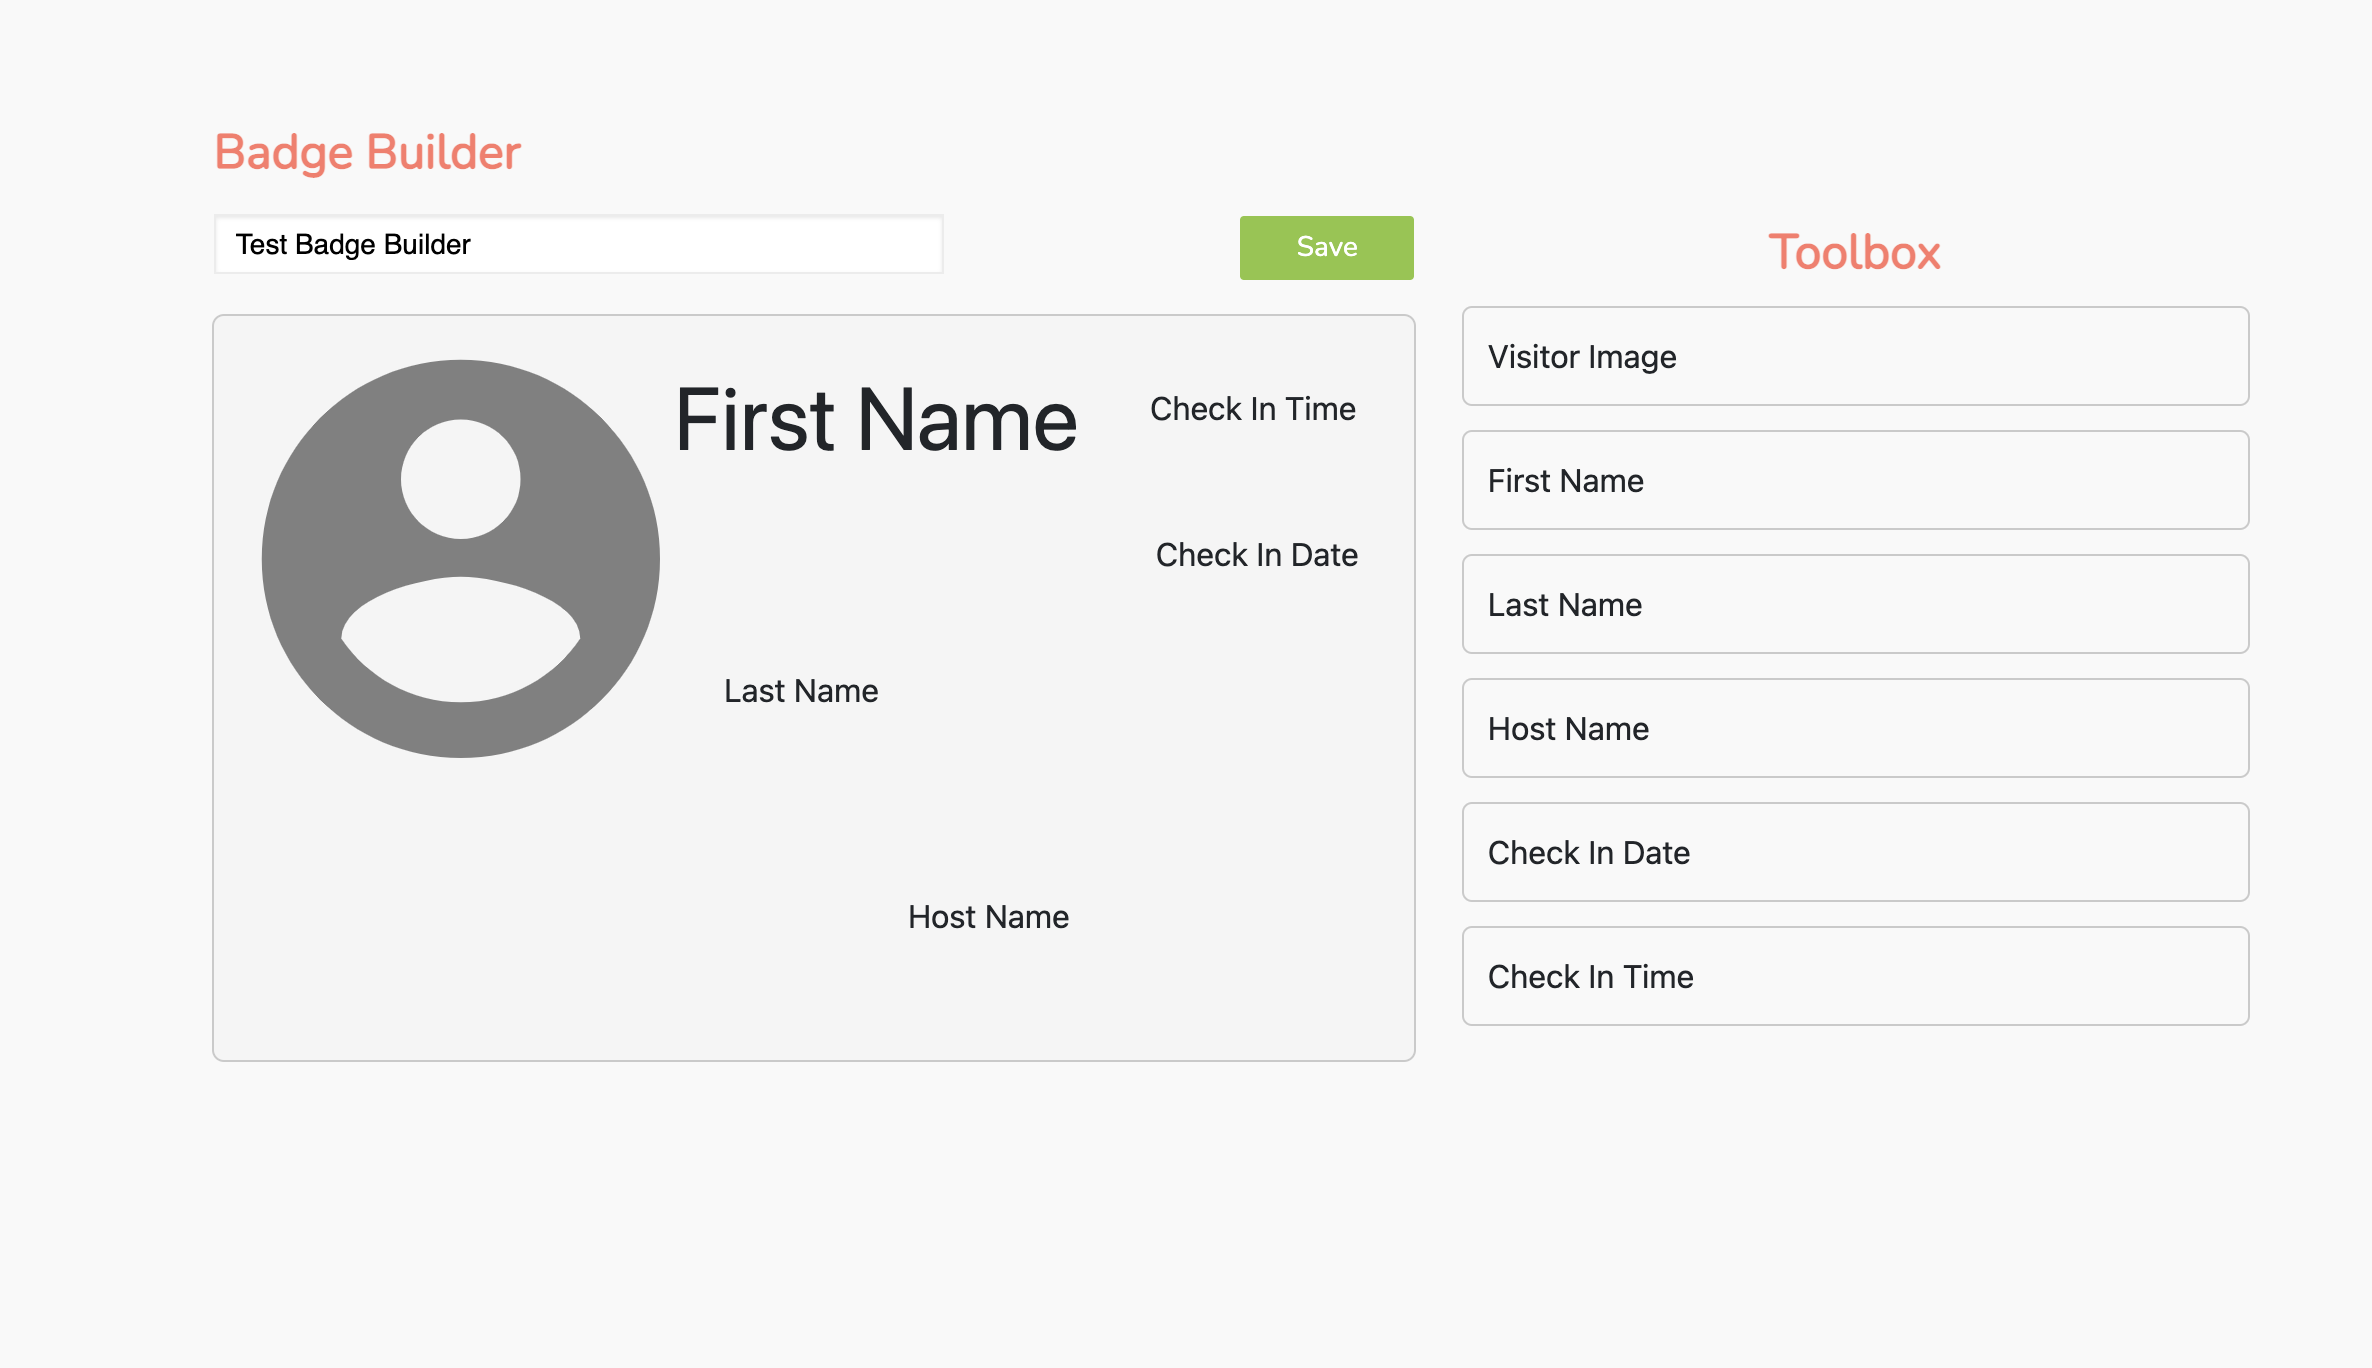
Design how you want the badges to look.
Items can be placed where you would like, and you are able to use an item more than once. You can also resize items as required.
Click on Save to save your changes.
Customizing New Badges for an Existing Workflow
Click on App Settings.
Click on Check-In Options tab.
Find the required Custom Check-In button.
Click on Edit Button Options.
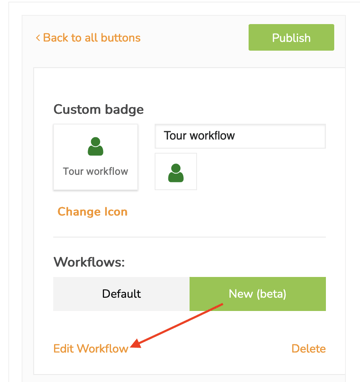
Click on New (beta) in the Workflows section.
Then click on Edit Workflow.
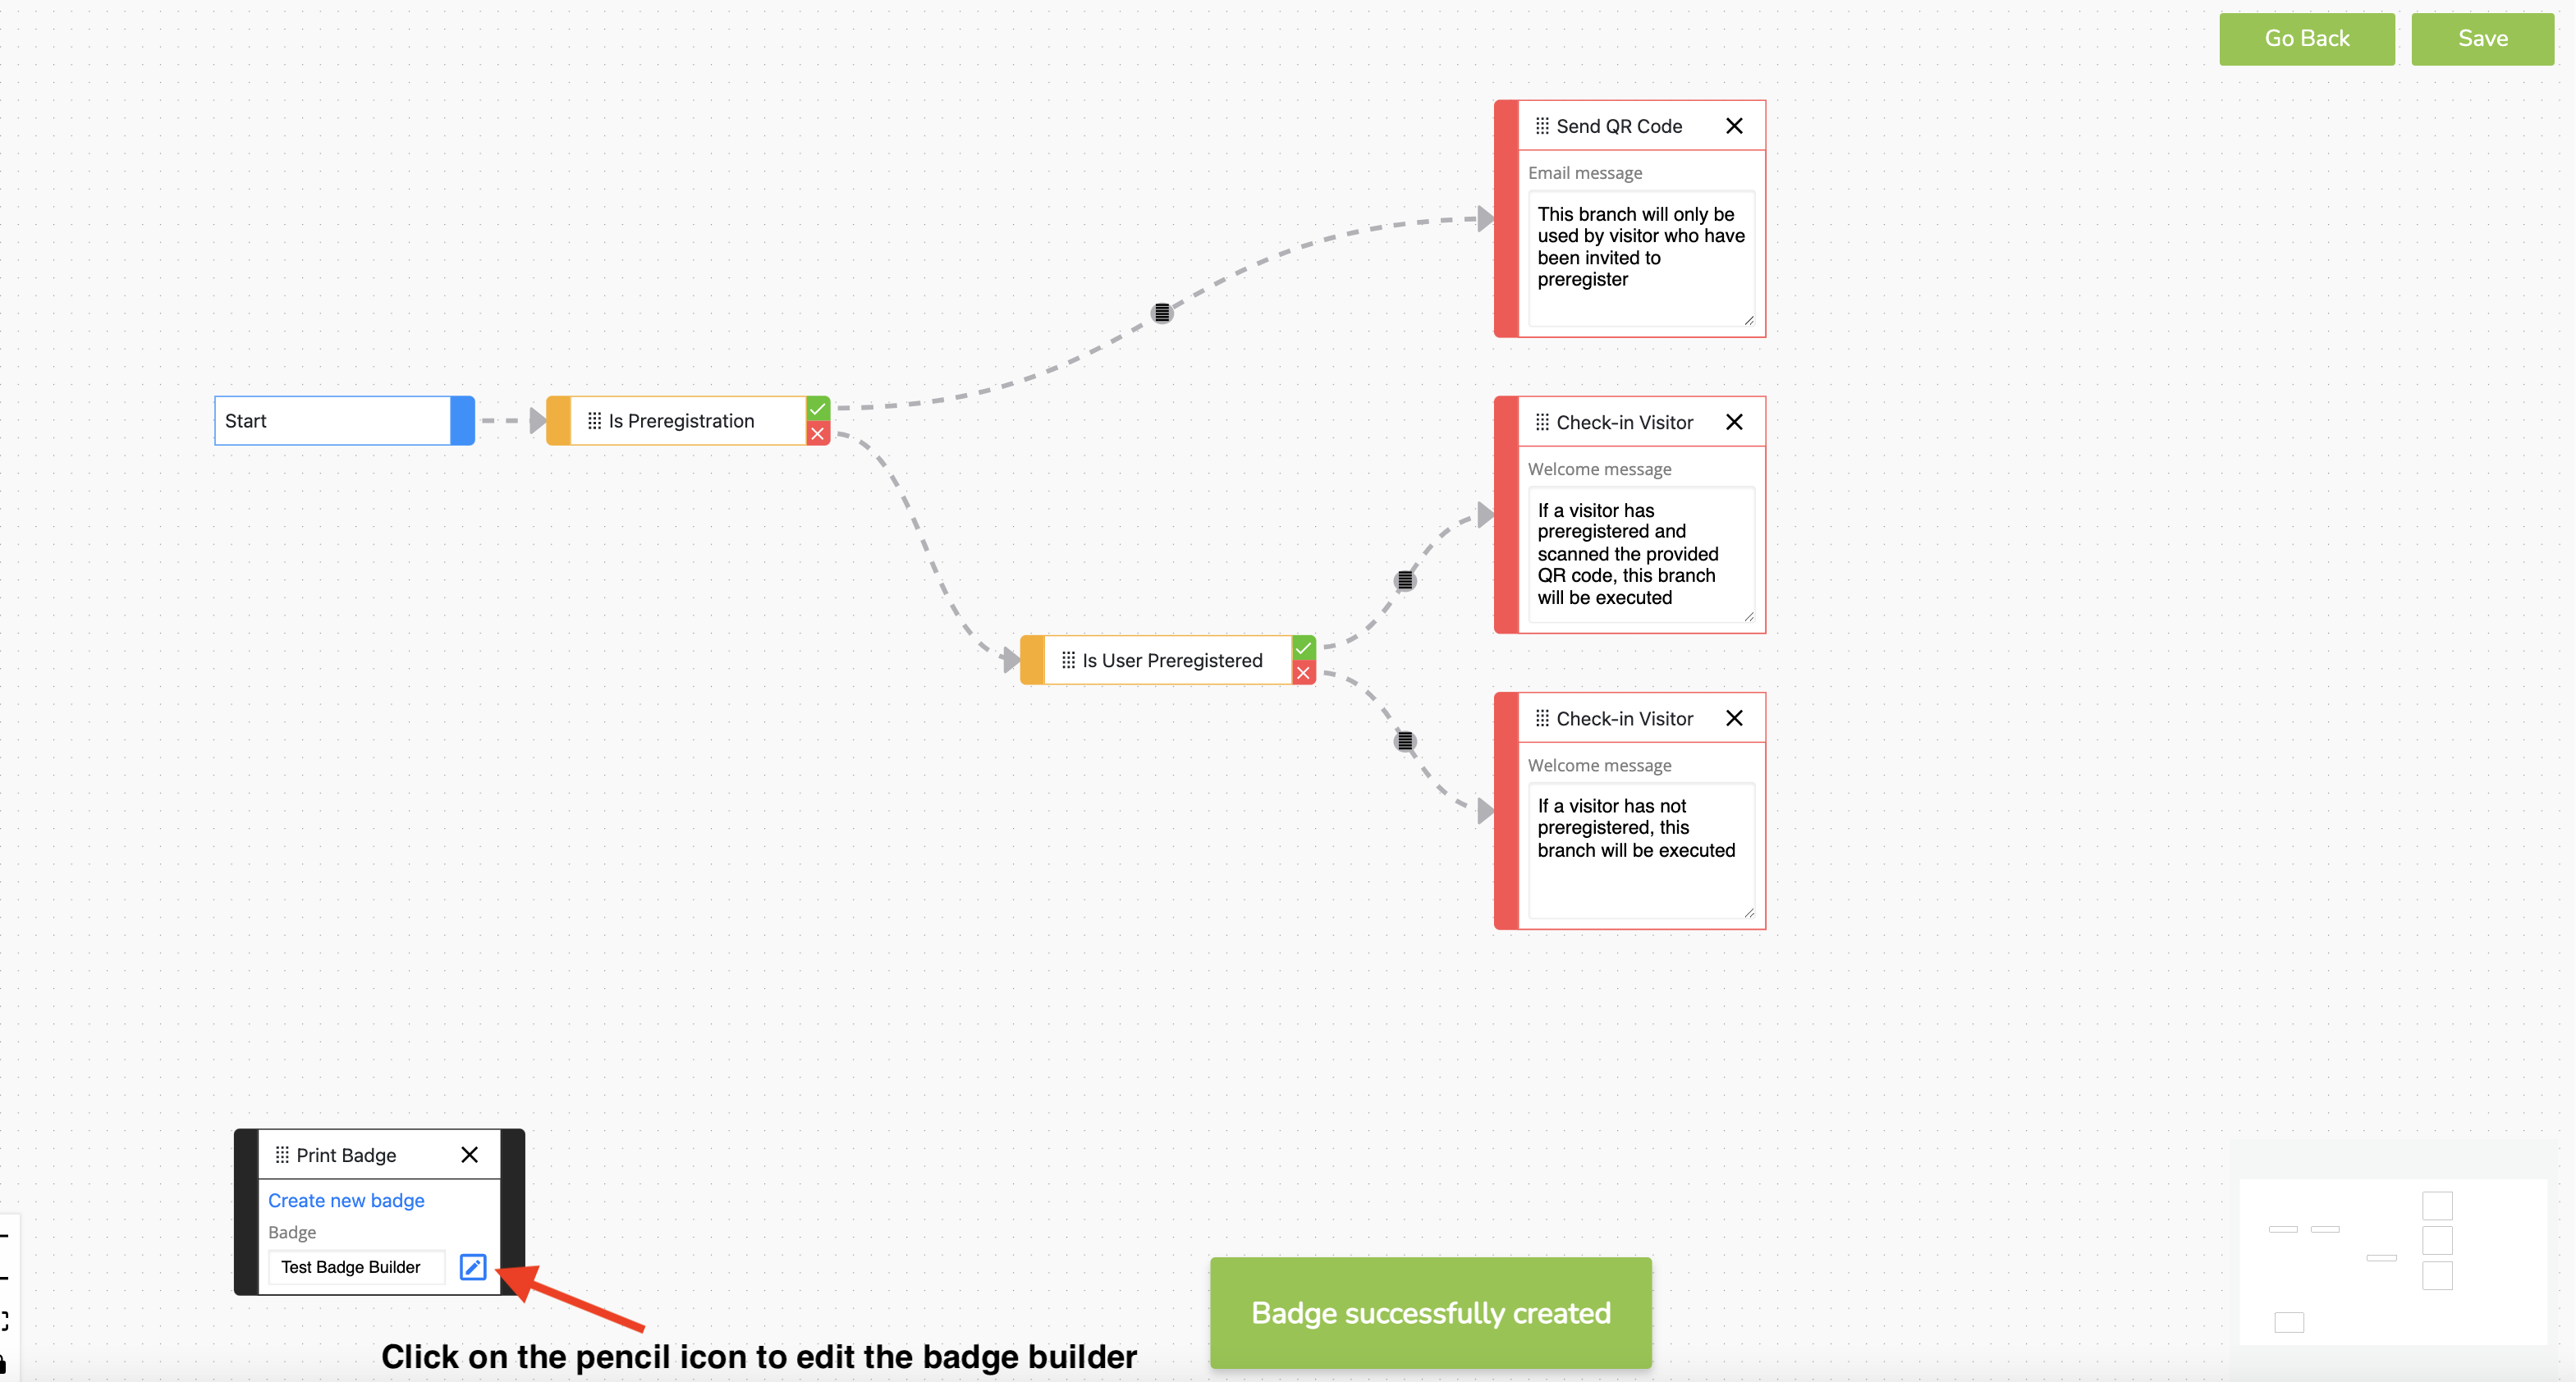
If there is already a Print Badge block in the workflow, select Create new badge.
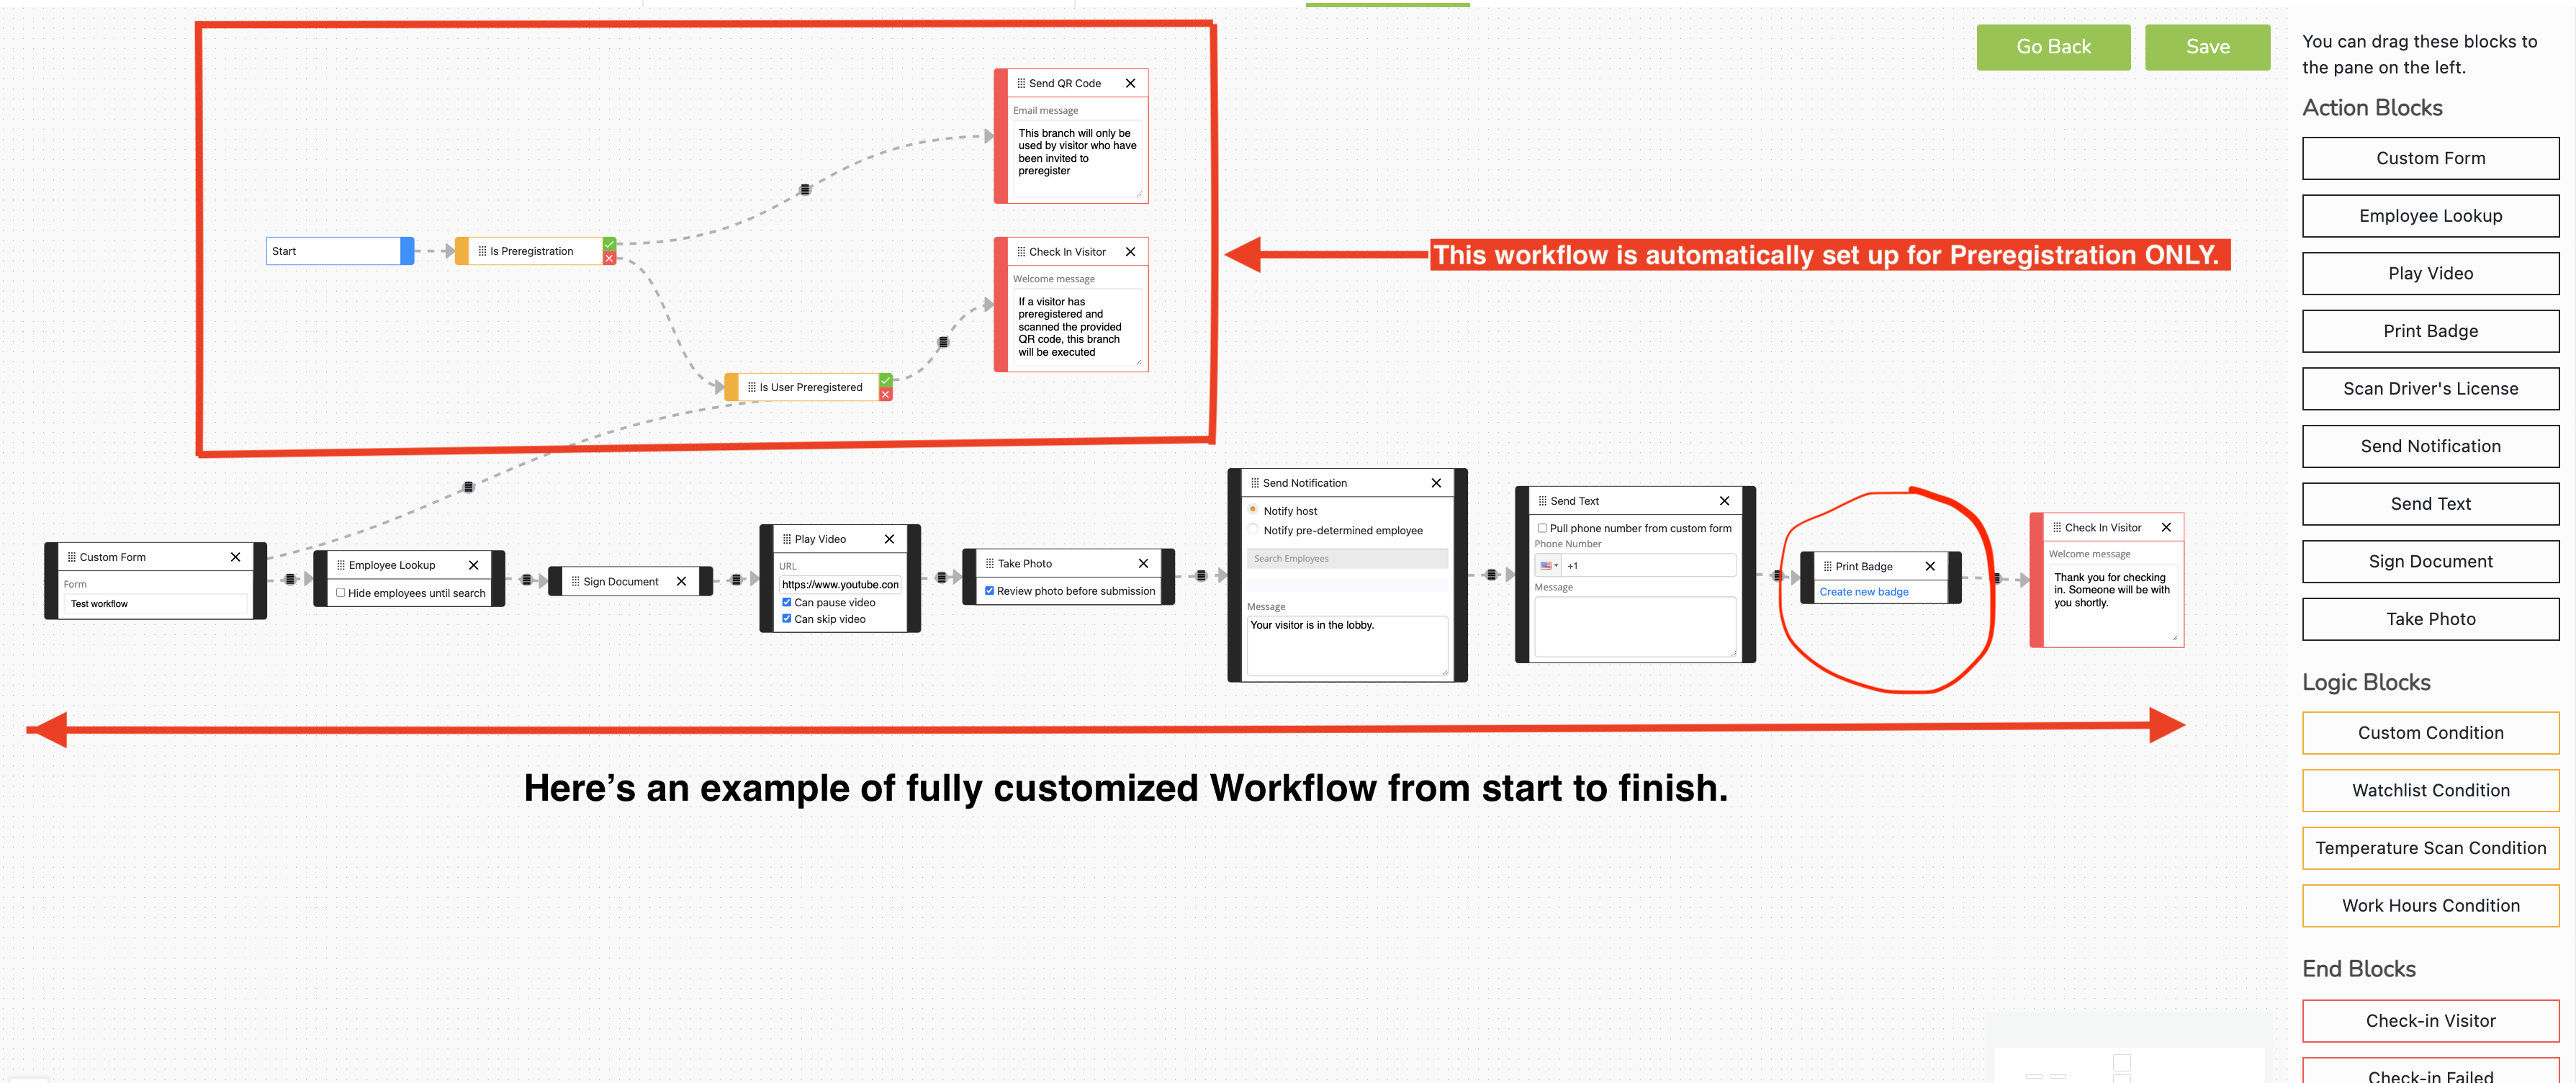
If there is not a Print Badge block in the workflow, then click on this block and drag it to the pane.
Place the block in the desired step of the workflow.
Example:
Name your badge builder.
Next, drop and drag the information you want to be displayed on the badge from the Toolbox section. For example, you can add the visitor’s check-in ID to the badge, guaranteeing that each badge has a unique number, which cannot be reused.
Design how you want the badges to look.
Items can be placed where you would like, and you are able to use an item more than once. You can also resize items as required.
Click on Save to save your changes.
Editing or Deleting the Badge Builder
To edit the badge builder, use the pencil icon.
To delete the badge builder, click on Delete.