Greetly Gateway Technical Doc
Summary:
Greetly gateway is a combination of software, Greetly hardware, or third party access control system that allows for Greetly to send secure command to these devices and instruct them to open the door or grant access.
Functional description.
Greetly Kiosk -- Greetly Cloud App -- Gateway / Access Controller - door lock.
Each Greetly check-in can be enabled with Gateway command that will instruct the Gateway to open a door (close or open relay) or pass RS232/RS485 to access controller. Additionally, if customer already has API enabled access control server Greetly can be configured in Cloud Only mode (discussed below) to instruct client access control to issue credentials and or open the door.
Greetly provided Gateway Configuration and Utilization:
Gateway hardware is built upon WebRelay Single Relay module running Revision 4.1 of the code (manual attached). https://www.controlbyweb.com/webrelay/manuals.html
Relay contacts are connected to access controller or directly to door magnet (see installation instructions) and customer network using ethernet cable.
The customer must enable port 443 or any other secure port on their firewall to allow Greetly Cloud to communicate with the device. Customer should also supply static IP address or Dynamic DNS to allow for stable communication.
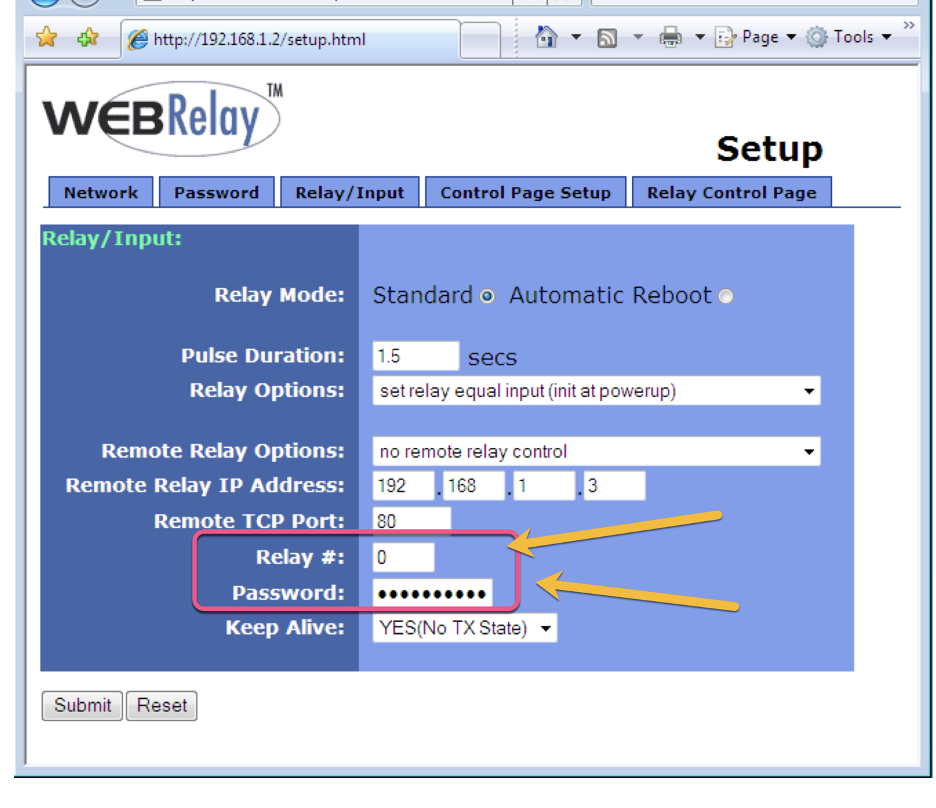
Once the Gateway is configured and is on the network. Customer should configure the maping between the relay to match their door lock or controller.
All of the red box fields below need to be defined by customer or installer.
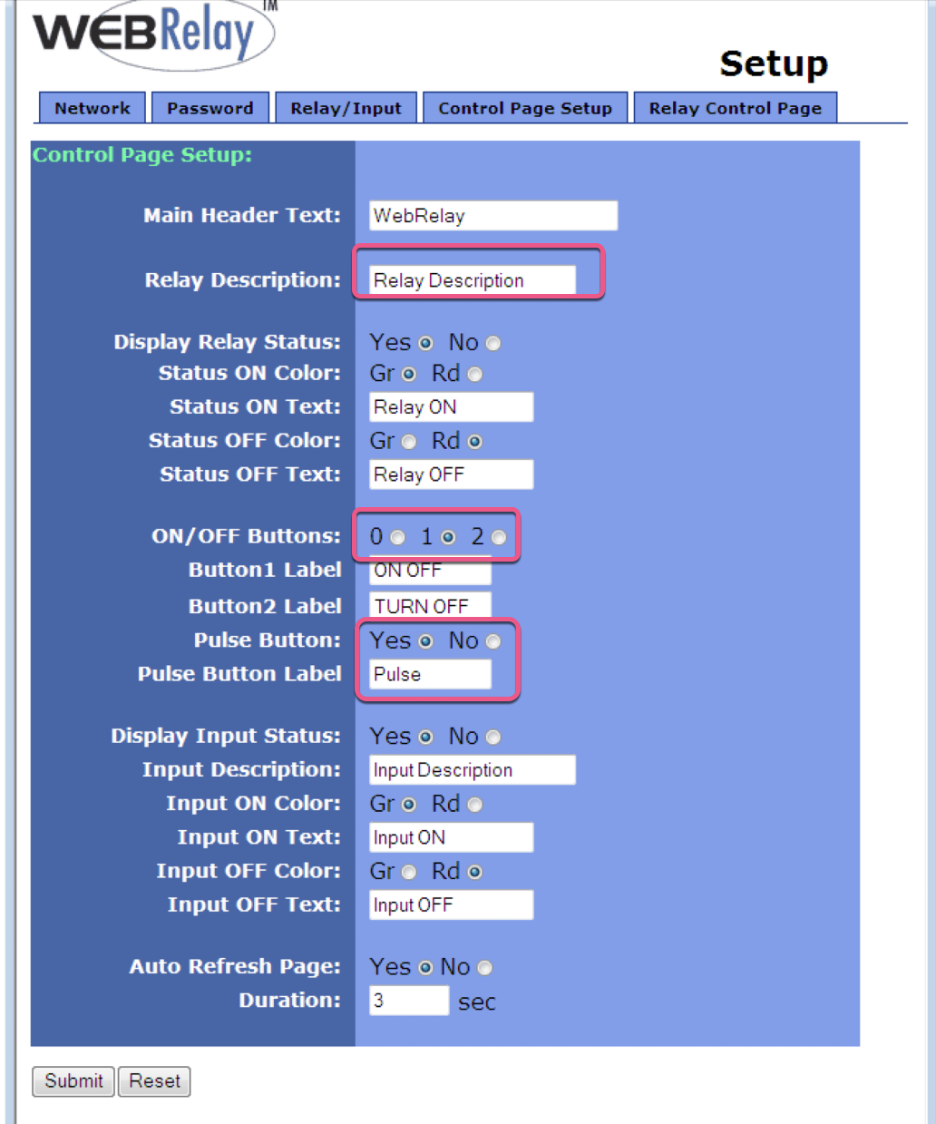
It is important that you document relay number and record your password.
Once you complete the setup you will need to write down the following information in notepad:
- IP or URL address of yoru gateway as seen from the cloud. Example https://gateway.customerdomain.com or https://75.12.14.15
- The password you created
- Relay: 0
- Relay State: 2
- Relay Time 5 seconds
You will then be able to form a query to turn the relay on/off which will open the door.
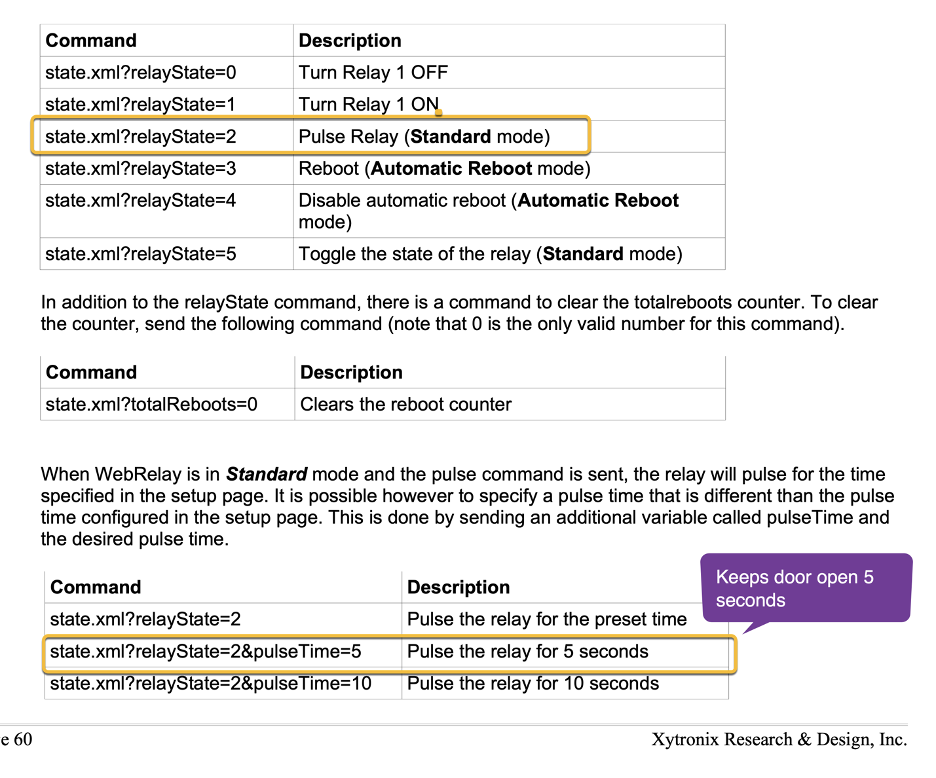
For our example we will have the following information:
- Address: https://gatewayHQ.greetly.com
- Password: #$%1234
- Relay# 0
- Relay State
- Relay Time 5 seconds
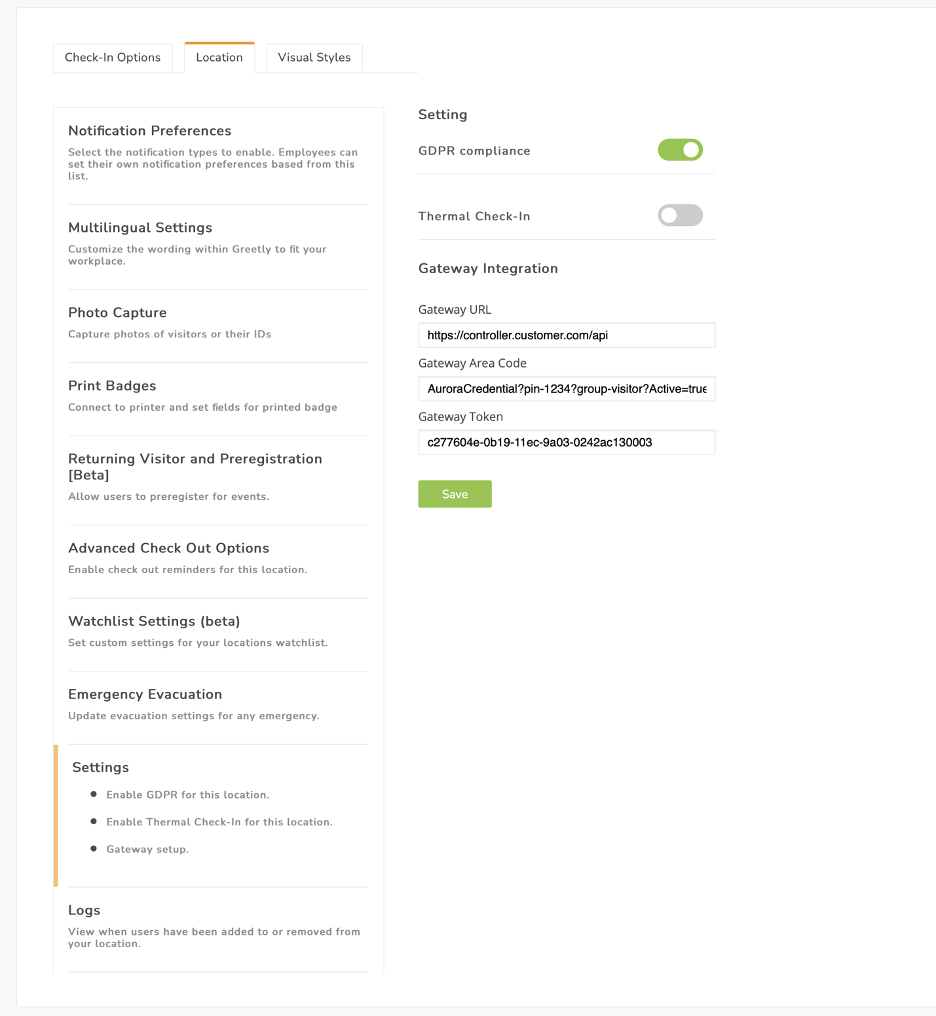
In Greetly Configure Check in Options
- Select Check-in Option that will have Gateway control
- Select Settings
- Transfer your information from notepad into the gateway fields
- Gateway area code is instruction to which relay and area control
- Token is your password.
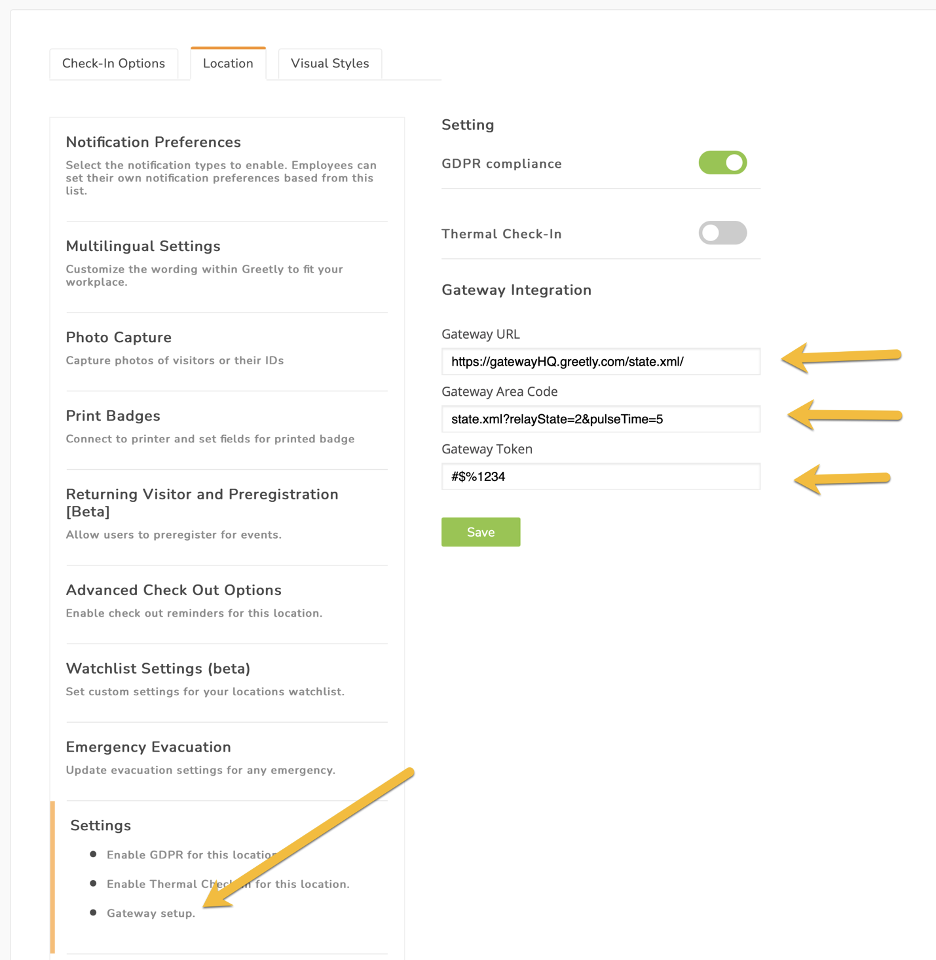
Once you save an publish your configuration, each checking will result in the door being open for 5 seconds.
You can expand Gateway Area Code URL to match any other XML instructions.
Not on the screen but by default Greetly adds Visitor First and Last Name (if available) to the end of each Gateway call that is recorded in the Gateway.
Using Gateway Functionality with Aurora Keyscan
Aurora Keyscan is an access control system that has an integration SDK/API available if the customer has purchased it.
Controller acts similar to the Gateway but instead of opening the door it is able to assign PIN code to each visitor and limit their access to certain group of doors. For more information see Keyscan API documentation.
In our example, when customer completes checking we will be sending a message to aurora/keyscan to register Visitor First Name and Last Name and assign then a pin number and specifying which door group they will have access to.
Configuration:
Customer shall provide you with URL address to access their controller.
In our example:
- Customer URL: https://controller.customer.com
- Customer Provided Group (visitors) that is mapped to which doors the visitors can access in their system
- Customer provided PIN number
Customer provided API token (c277604e-0b19-11ec-9a03-0242ac130003)
Functionality:
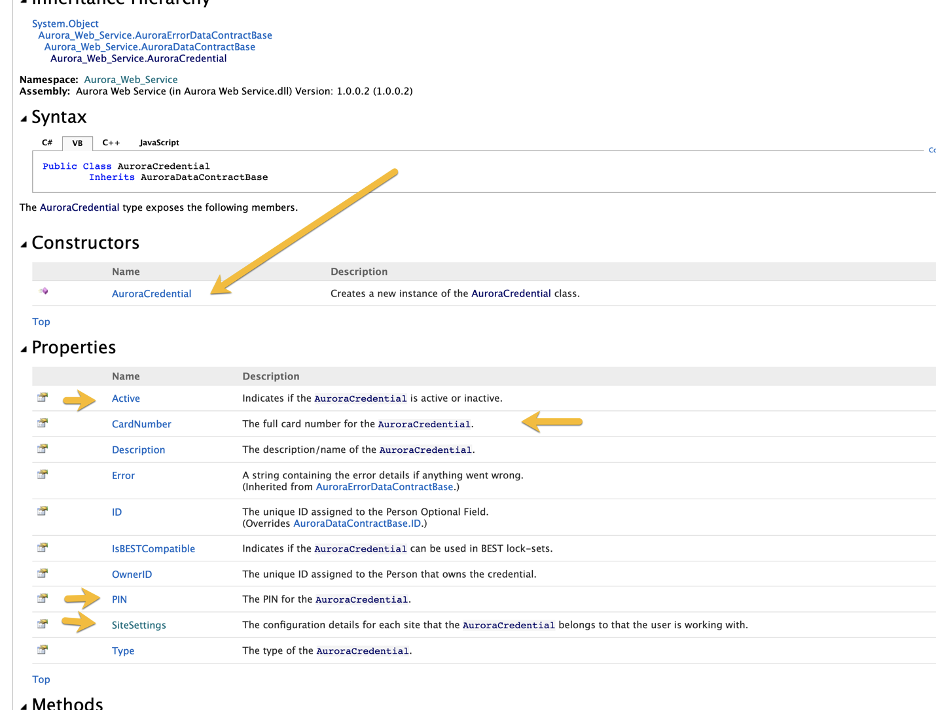
At the completion of check-in the system will connect to Aurora/Keyscan and pass the following information:
- Visitor Name
- Group name (visitors) for this visit.
- Greetly Check In ID as Card Number
- PIN number
- And Activates the card.
For Keyscan aurora this will looke like this /api/AuroraCredential?pin-1234?group-visitor?Active=true
Please Note that Visitor Name will be automatically recorded in description (as extra passed field) and Greetly CheckIn ID will be automatically absorbed as CardNumber and ID.
Once you gathered all the info you are ready to configure Greetly
- In check-in options configuration
- Select settings
- Complete gateway fields
At the end of check-in the user will be able to ope designated doors using the PIN number set.