The ability to customize the visitor management experience for your workspace is one of many things Greetly can offer. Not only can you customize the visuals and template check-in options, you can also create a custom workflow with our easy configuration wizard.
Creating a Custom Button
Log into the Greetly web-based admin portal.
Click on Check-in options.
Click on Add a Custom Button at the bottom of the screen.
![]()
The New Check In Option screen then opens.
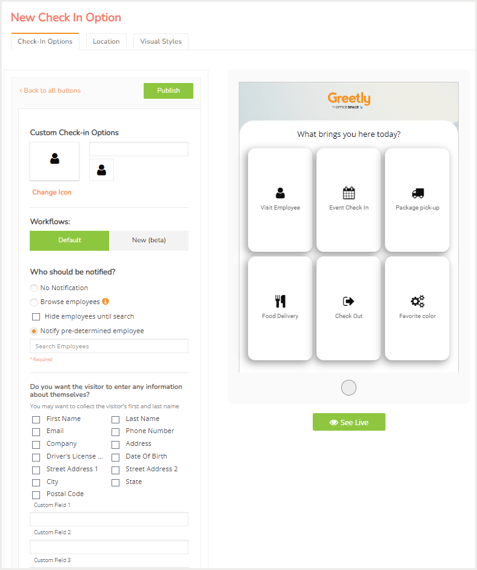
Use this screen to customize the button. You can preview your button at any time by clicking on View Live.
Customizing the Check-in Button
There are several customization options available, including:
Name
You must enter a name for the custom button.
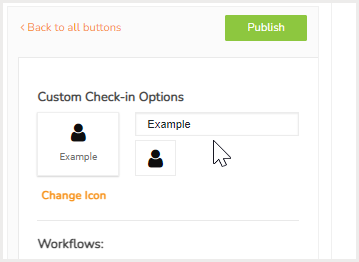
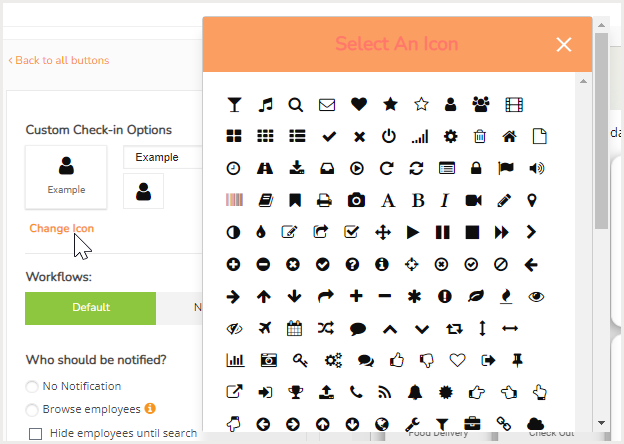
Icon
Click on Change Icon to display a list of icons that can be used for the button.
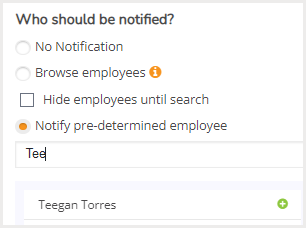
Notifications
The available options include:
-
No Notification
-
Browse all employees
- Note that here you can enable the option to hide the employee list until the visitor enters multiple characters
-
Notify pre-determined employee
-
Start typing the employee's first name into the box until the name populates
-
Visitor Information
You can select the information collected from the visitor during the check-in process. You can include up to three custom fields, as required.
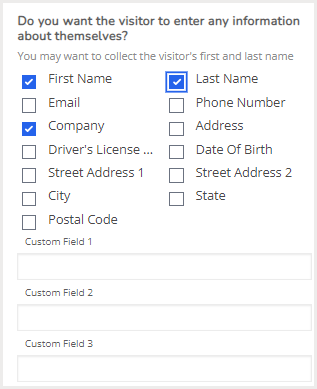
If you want to use only custom fields, you will need to select First Name and Last Name, enter the text into the Custom Field(s), and then click on Publish.
Then, uncheck First Name and Last Name, and click on Publish again.
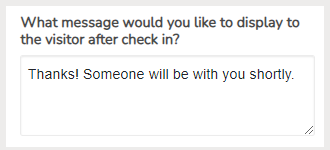
Visitor Message
You can add a custom message for your visitor.
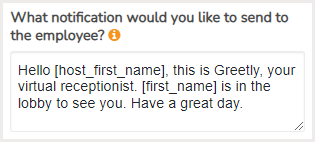
Employee Notification
You can also customize the notification to your employee.
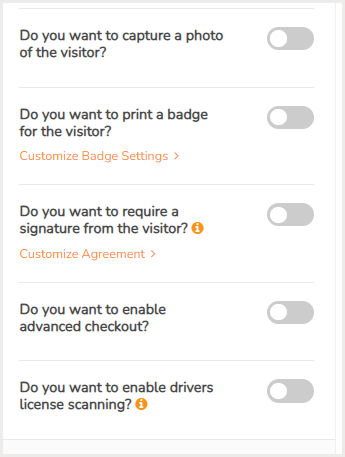
Other Options
There are other check-in options that can be toggled on or off, as required. The default setting is off. These options include:
- Capture a photo of the visitor
- Print a badge for the visitor
- Require a signature
- Enable advanced checkout, which will remind the host or visitor to checkout
- Enable drivers license scanning
After you have completed your customization, click on Publish to create the button.