Removing someone from the Greetly visitor management system employee directory is quick and easy.
You must be a Global or Location Admin logged into your web-based admin portal to complete this action.
Deleting a Single Employee
Click on Manage Users in the top navigation bar, or click on the Manage Users icon.

Locate the employee you want to delete. You can use the search bar to locate an employee by name.
Click on Delete beside their name. On the right side of the screen, you will see the delete button.

A pop-up appears asking you if you are sure you want to delete this user.
Click on OK to delete the user.
Another pop-up then confirms that the user was deleted successfully.
Click on OK to close this pop-up.
Deleting Users with Elevated Permissions
To delete users with elevated permissions (Global Admins, Location Admins, Security), you need to be a Global Admin logged into your web-based admin portal.
Click on Manage Users in the top navigation bar, or click on the Manage Users icon.
Click on the user's record to open the Edit User page.
Change their role to Employee.
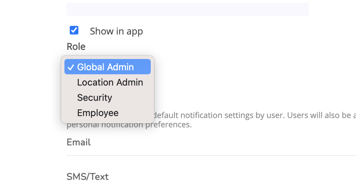
Click on Save.
Go back to the main Manage Users page.
Locate the same user.
Click on Delete beside their name.
A pop-up appears asking you if you are sure you want to delete this user.
Click on OK to delete the user.
Another pop-up then confirms that the user was deleted successfully.
Click on OK to close this pop-up.
Deleting Multiple Users at a Time
If you have many users in several locations that you want to delete, Greetly makes this possible.
You must be a Global Admin logged in to your web-based admin portal to perform this action. And, if any of the users you will be deleting are Location or Global Admins, you will need to edit their profiles first, to change their roles to Employee, before you can delete them.
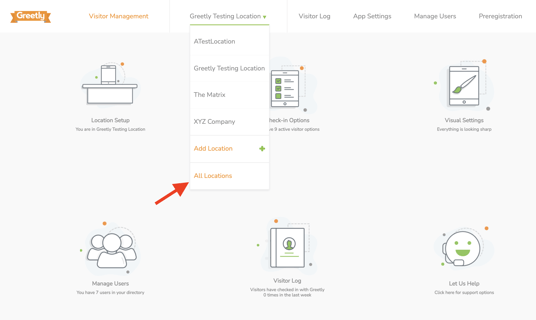
Click on your location name and click on All Locations.
Click on Manage Users in the top navigation bar, or click on the Manage Users icon.
Select how user entries will be displayed.
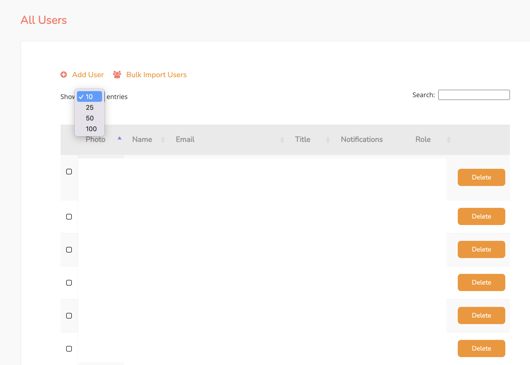
Click on the checkboxes next to the users names.
A Delete button appears on the top left-hand side of the page.
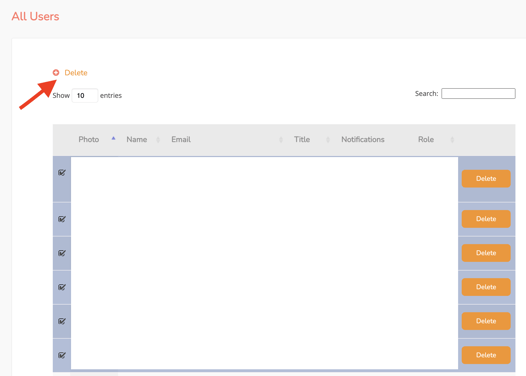
Click on Delete.
A pop-up appears asking you if you are sure you want to delete.
Click on OK to delete to proceed.
Another pop-up then confirms that the users was deleted successfully.
Click on OK to close this pop-up.