If you want to use your Apple iPad tablet for a singular purpose -- to create a great reception experience for your space -- that means limiting people from using other apps like Safari, Maps or the Camera.

If you want to use your Apple iPad tablet for a singular purpose -- to create a great reception experience for your space -- that means limiting people from using other apps like Safari, Maps or the Camera.
This is where Guided Access comes in play.
What is Guided Access?
Guided Access is a setting on the iPad which limits your device to a single app and lets you control which app features are available.
Set up Guided Access
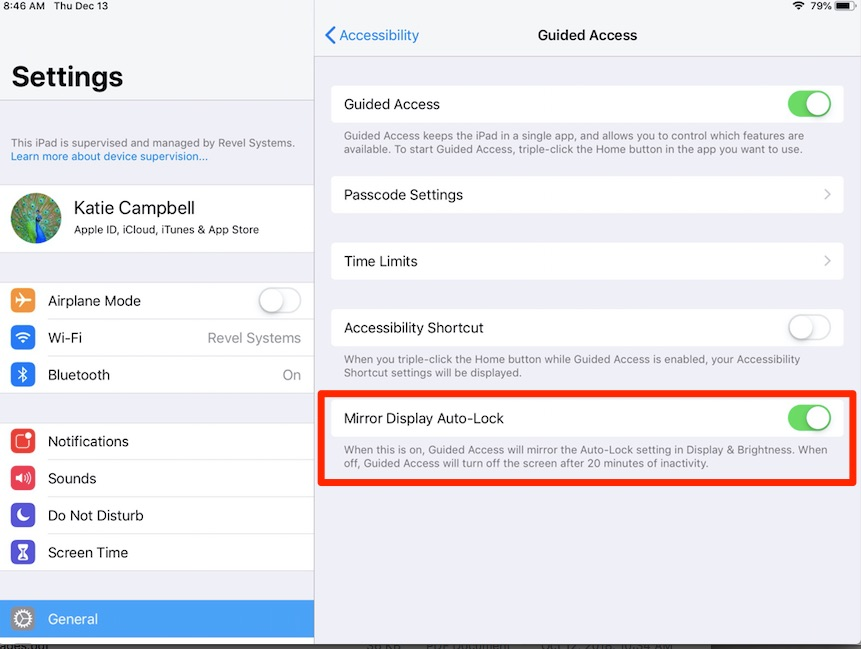
Tap Settings > General > Accessibility > Guided Access to set up Guided Access. From there, here's what you can do:
- Turn Guided Access ON
- Set a passcode that controls the use of Guided Access and prevents someone from leaving an active session
- Toggle Mirror Display Auto-Lock ON
- Note: Go to 'Accessibility" in Settings to access "Display Auto lock" on some iPad models. Select "Never". Open "Display & Brightness settings" > Go to Auto-Lock > Select "Never".

Start a Guided Access session
To start a Guided Access session, follow these steps:
- Open the app you want to use.
- Triple-click the Home button on the iPad.
- Adjust settings for the session, and then tap Start.
End a Guided Access session
If you're using Touch ID on your iOS device, you can use it to end a Guided Access session. First, go to Settings > General > Accessibility > Guided Access > Passcode Settings and turn on Touch ID. Now, when you're using Guided Access, you can end the session by following these steps:
- Press the Home button once.
- Use Touch ID.
If you're not using Touch ID on your device, follow these steps to end a Guided Access session:
- Triple-click the Home button on the iPad.
- Enter the Guided Access passcode.
For the full article, head over to the the Apple Support site at: https://support.apple.com/en-us/HT202612