You can connect your Brother QL-820NWB or QL-820NWBc printer via Bluetooth and print your visitor badges. It is important to note that you can have only one device for each location connected to the app and printer in order for the printer to print badges. You cannot use short-codes in the printing settings (ex: [check_in_option_name]).
Prior to connecting your printer, ensure that the time and date have been set on the printer, and that these both match the time zone listed in your web portal account.
Only use black ink to print badges.
You must be a Global or Location Admin logged into your web portal account to access this feature.
Connect Your Device and Printer via Bluetooth
Use the [▲] and [▼] buttons to choose BLUETOOTH > BLUETOOTH (On/Off) > Turn On BLUETOOTH in the settings menu.
Press OK.
Use the [▲] and [▼] buttons to choose BLUETOOTH > Automatic Reconnection (On/Off) > On in the settings menu.
Press OK.
From the iPad's home screen, go to Settings > Bluetooth.
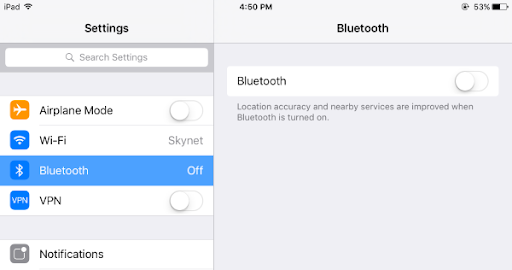
Toggle Bluetooth on.
Locate your printer under Other Devices.
You should see your printer labeled as QL-820NWBXXXX.
Select your printer.
It will move to My Devices and say Connected.
Turning on Visitor Badge Printing
Log into your web-based admin portal.
Click on Check-in Options in the top navigation bar or click on the Check-in Options icon.
The Check-in Options page then opens.
Locate the required workflow that requires badge printing and click on Edit Button Options.
Toggle on the options Do you want to print a badge for the visitor?
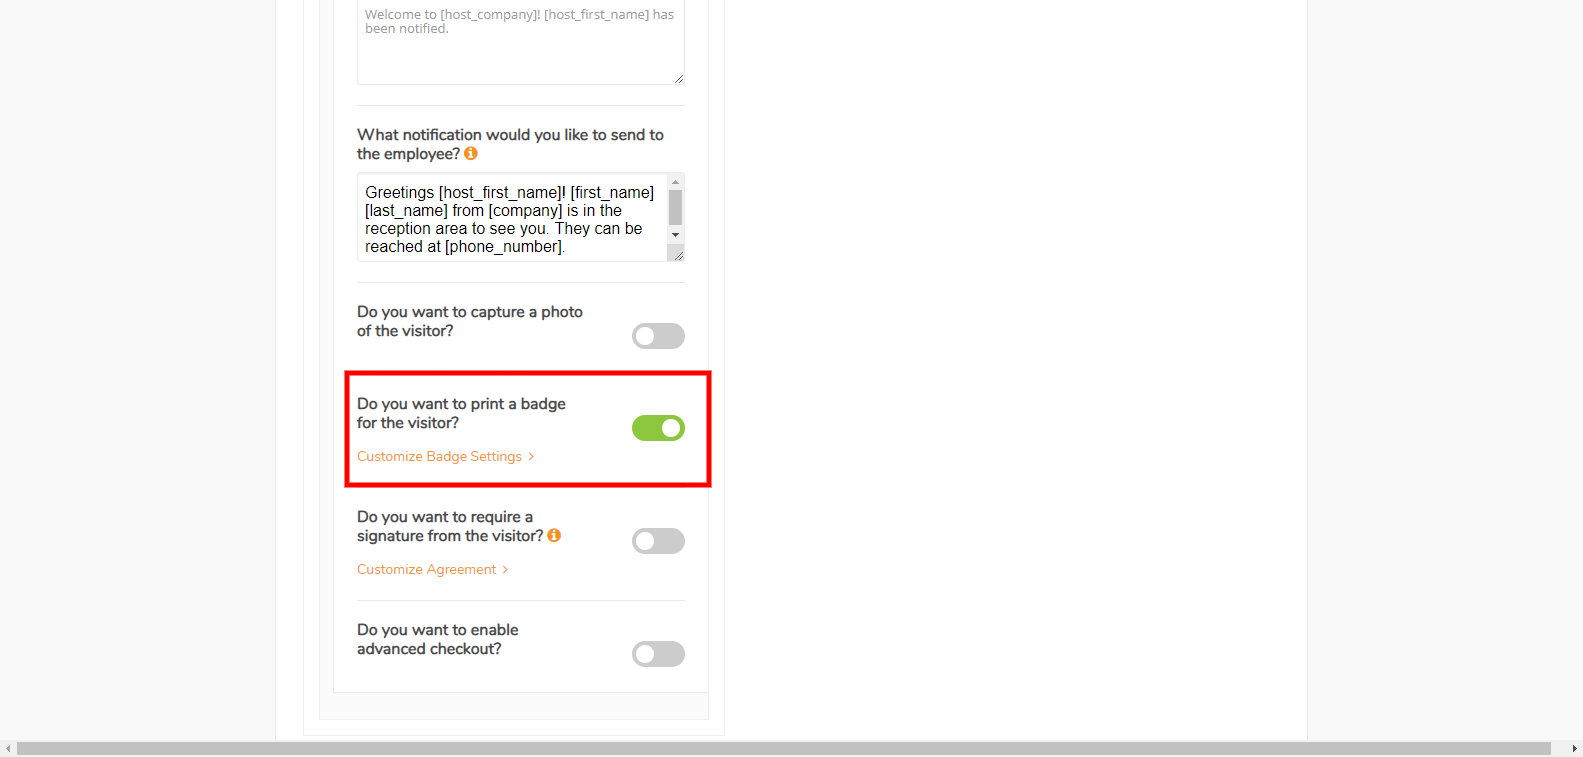
Click on Customize Badge Settings to open the Print Badges page for more options.
Always remember to leave the field Your printer's IP Address empty.
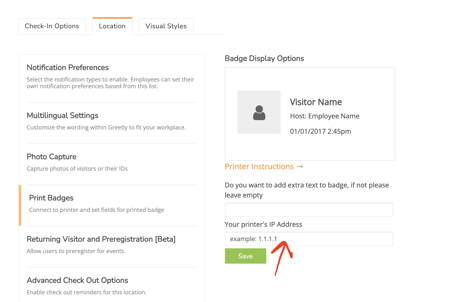
Your company logo will print in a standard size. The printer is not able to increase the logo size.
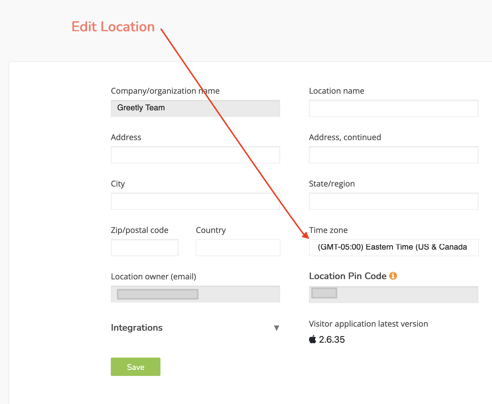
Go to Location Setup and select the time zone that matches time zone of the printer.
Testing the Printer
Greetly works with Brother printer models QL-820NWB or QL-820NWBc and with DK-1202 labels (in the US) or DK-11202 labels (outside the US) only.
Do not use the sample labels that come with the printer (DK-2205) as the printer will not respond. Before testing, ensure that you have the correct labels inserted.
You have two options for testing your setup:
- On your device, open the Greetly visitor check-in app, and check in as a visitor. A badge will print a couple of seconds after you complete the check-in workflow.
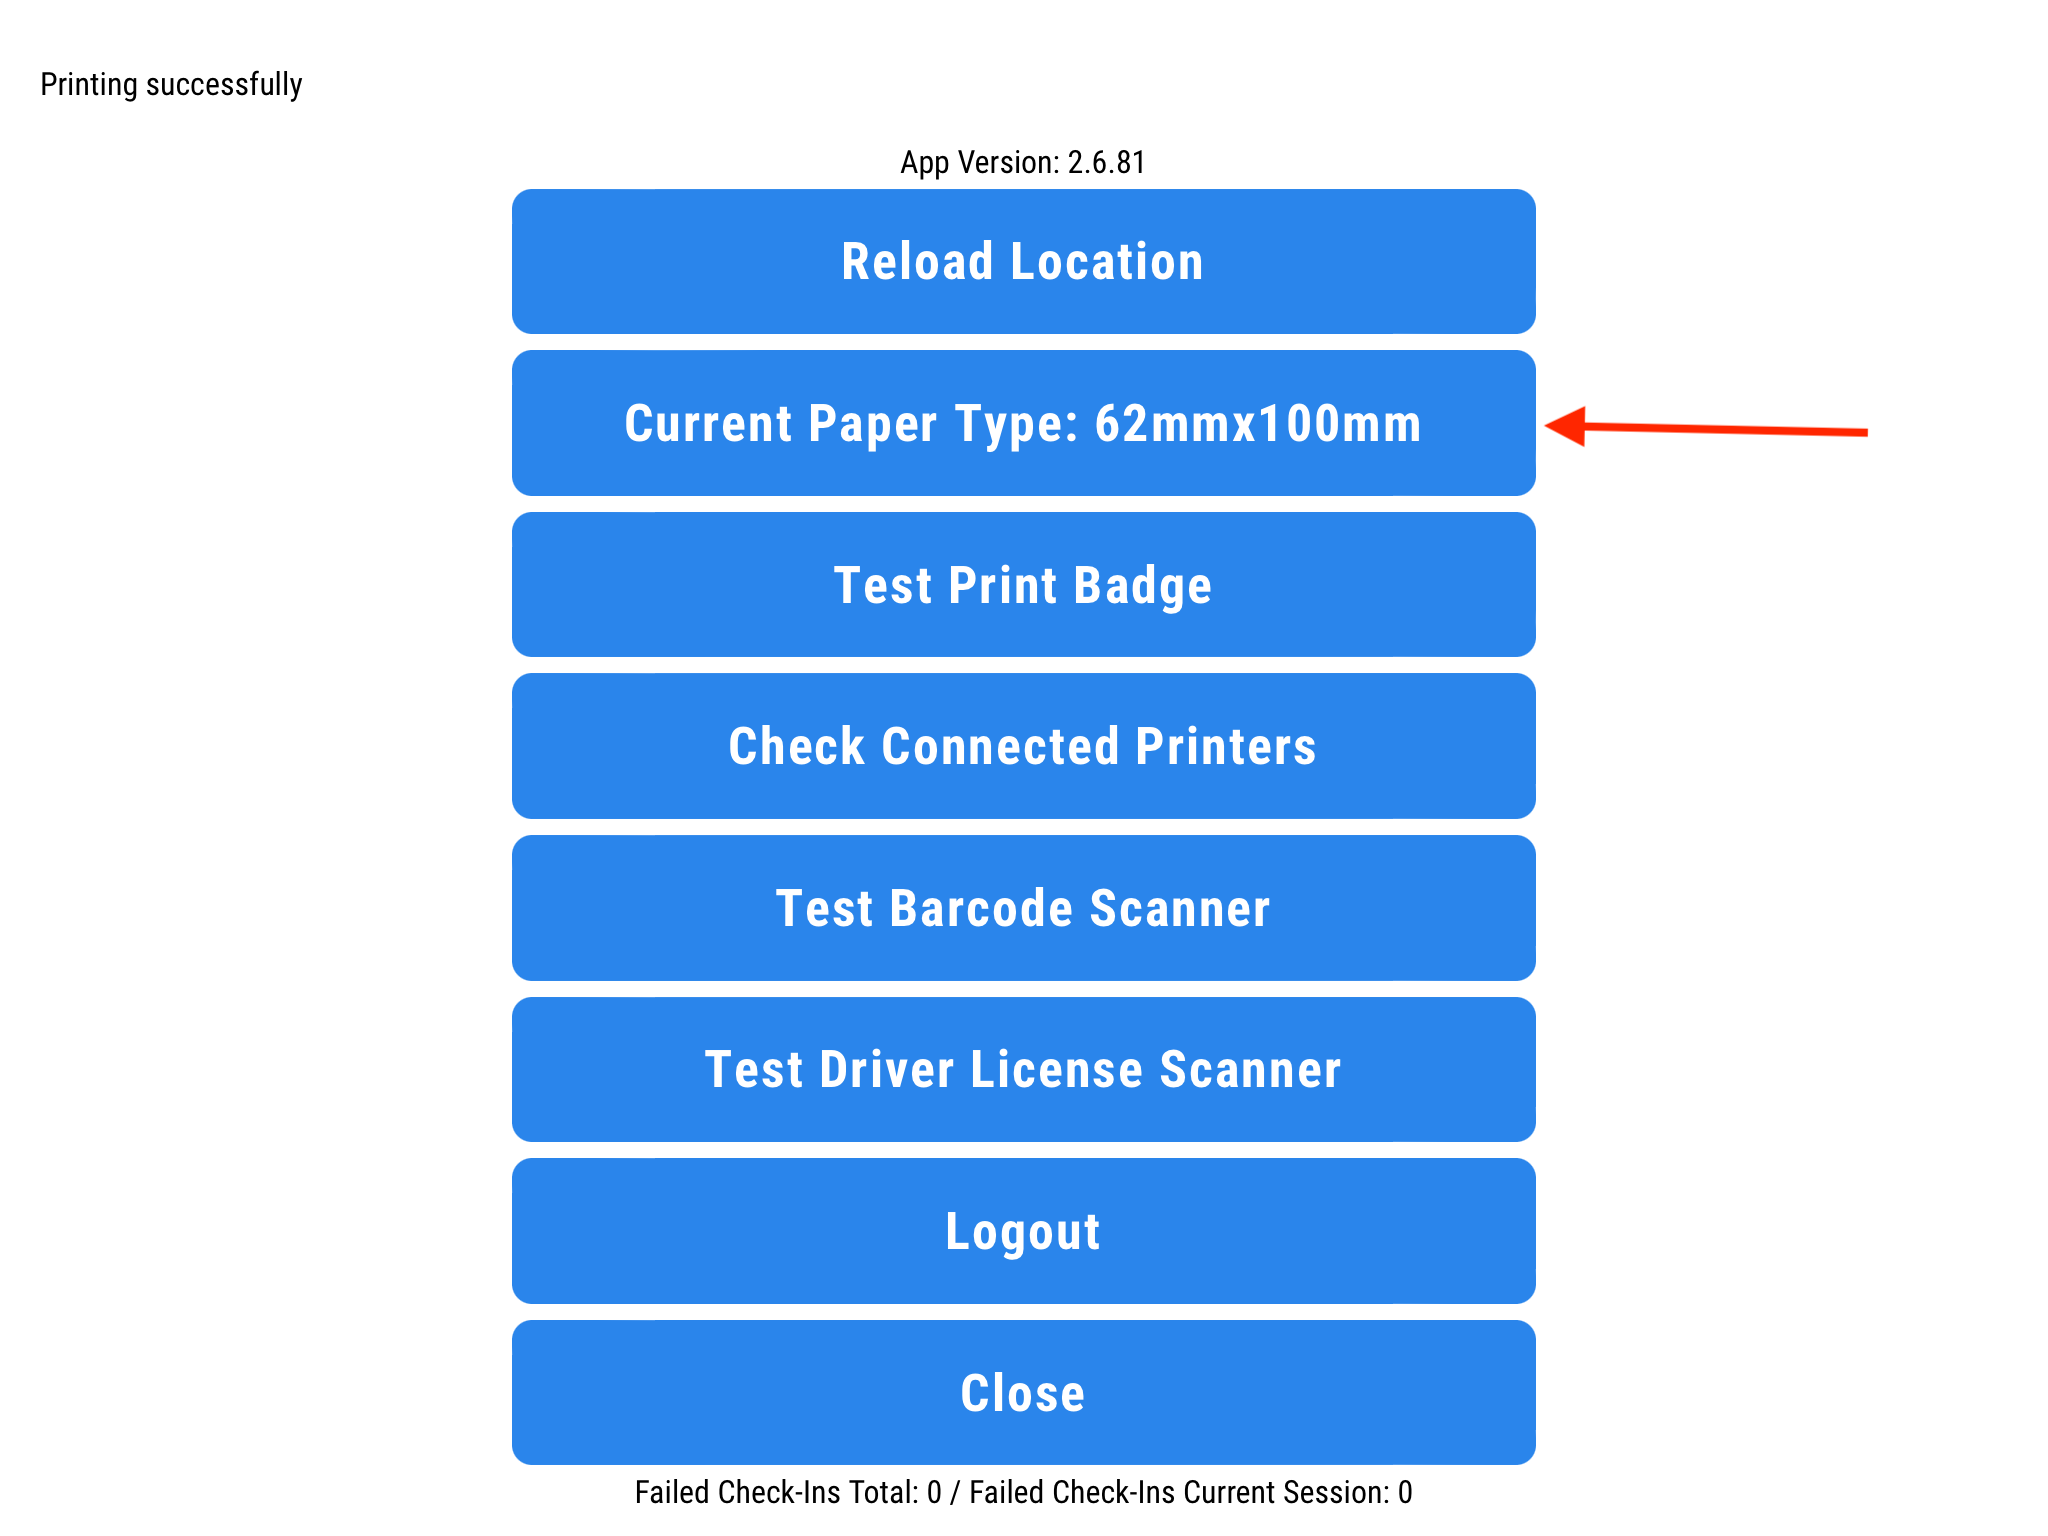
- Open the hidden menu and press Test Print Badge.