Make limitless, exceptional workflows for every visitor type to accommodate your business processes. Give your visitors a different experience based on their reason for checking in to your establishment. This permits you to pose visitors questions that matter, in an extremely easy to understand format.
-
Important Notes:
- Make sure you are running the latest Greetly Digital Receptionist app version from the App Store
- You'll need to be logged into your web portal as a Global or location admin.
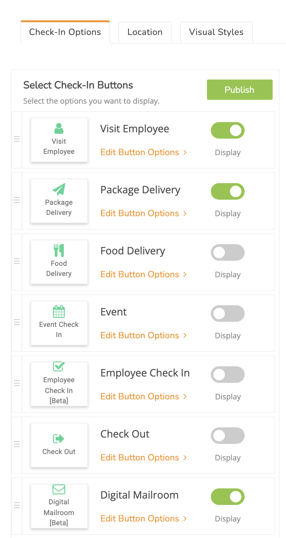
- You can ONLY create New (beta) Workflows for Custom Check-in buttons. (Example: You cannot create a New (beta) workflow for default Check-in buttons such as Visit Employee, Package delivery, Employee Check-in, Food delivery, Digital Mailroom, or Event Check-in).
- You can create different New (beta) Workflows for each Custom Check-in button.
- If you want to stay with the default workflow you can follow the steps on how to create a custom check-in button in this knowledge base article.
Example: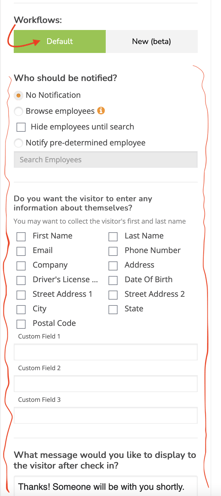
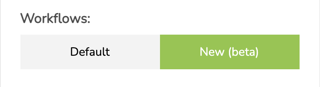
- You cannot use the Default and New (beta) Workflows at the same time for a Check-in button.
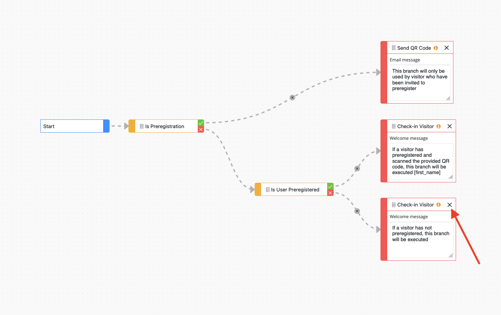
Example of a fully customizable New (beta) Workflow:

Follow these steps on how to create a New (beta) Workflow:

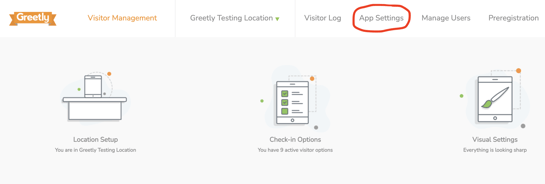
- Click on "App Settings"
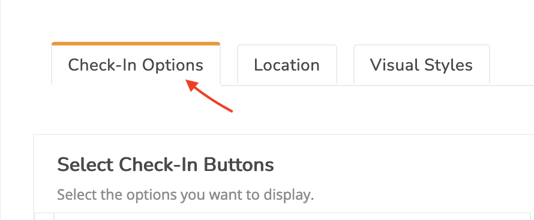
- Click on "Check-in Options"
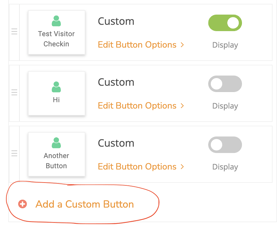
- Scroll down and click on "Add a Custom Button" or Edit a Custom button
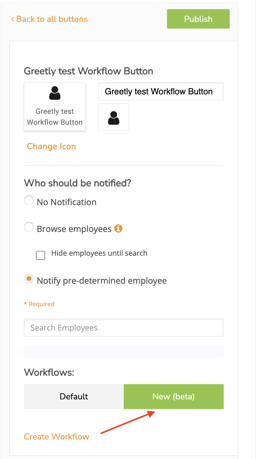
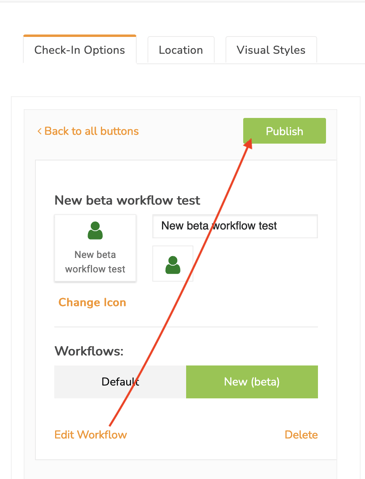
4. Name your custom button and click on "Publish"
5. In the "Workflows" section, click on "New (beta)" and click on Create Workflow
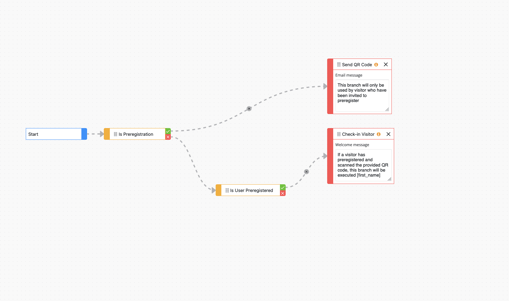
6. This is how the Workflow page will look when you click on it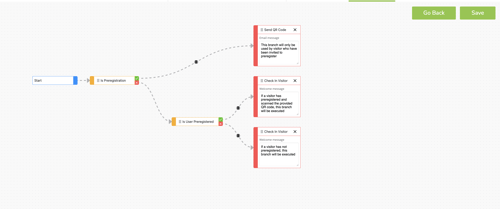
7. Click on the "X" to delete the "Check-in Visitor box
** It will look like this after
8. Select "Custom Form" for your first block and drag it to the pane and connect it to the "X" where it says " Is user Preregistered"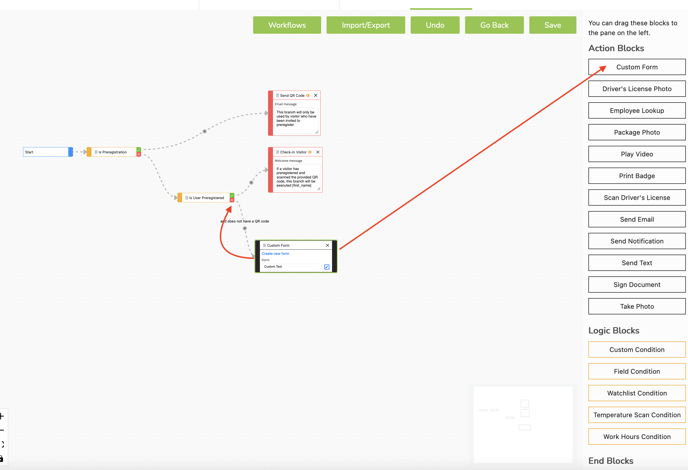
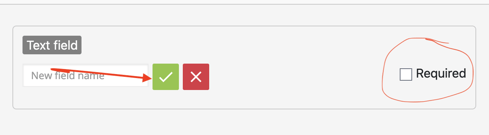
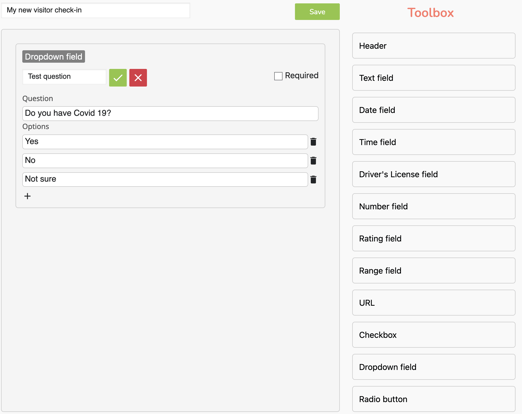
9. Create your custom questions inside the form. Click on "Create a custom form" inside the Custom form block.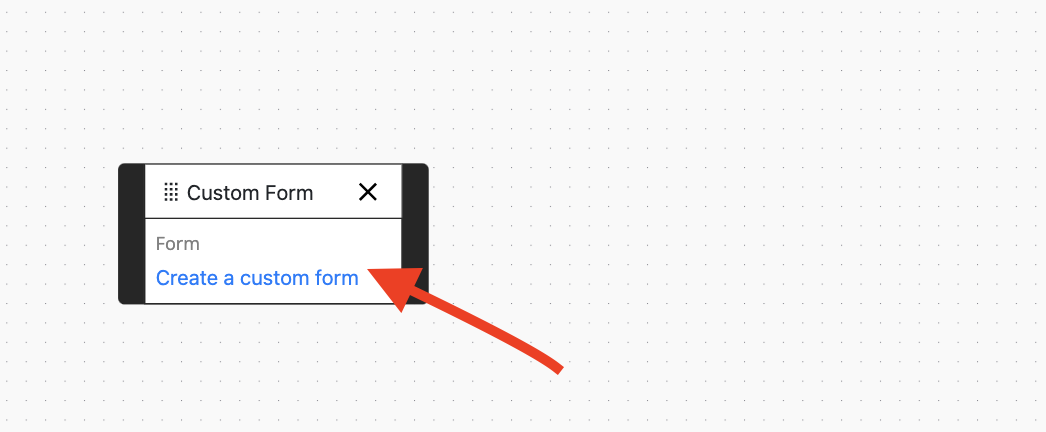
10. Name your Workflow form.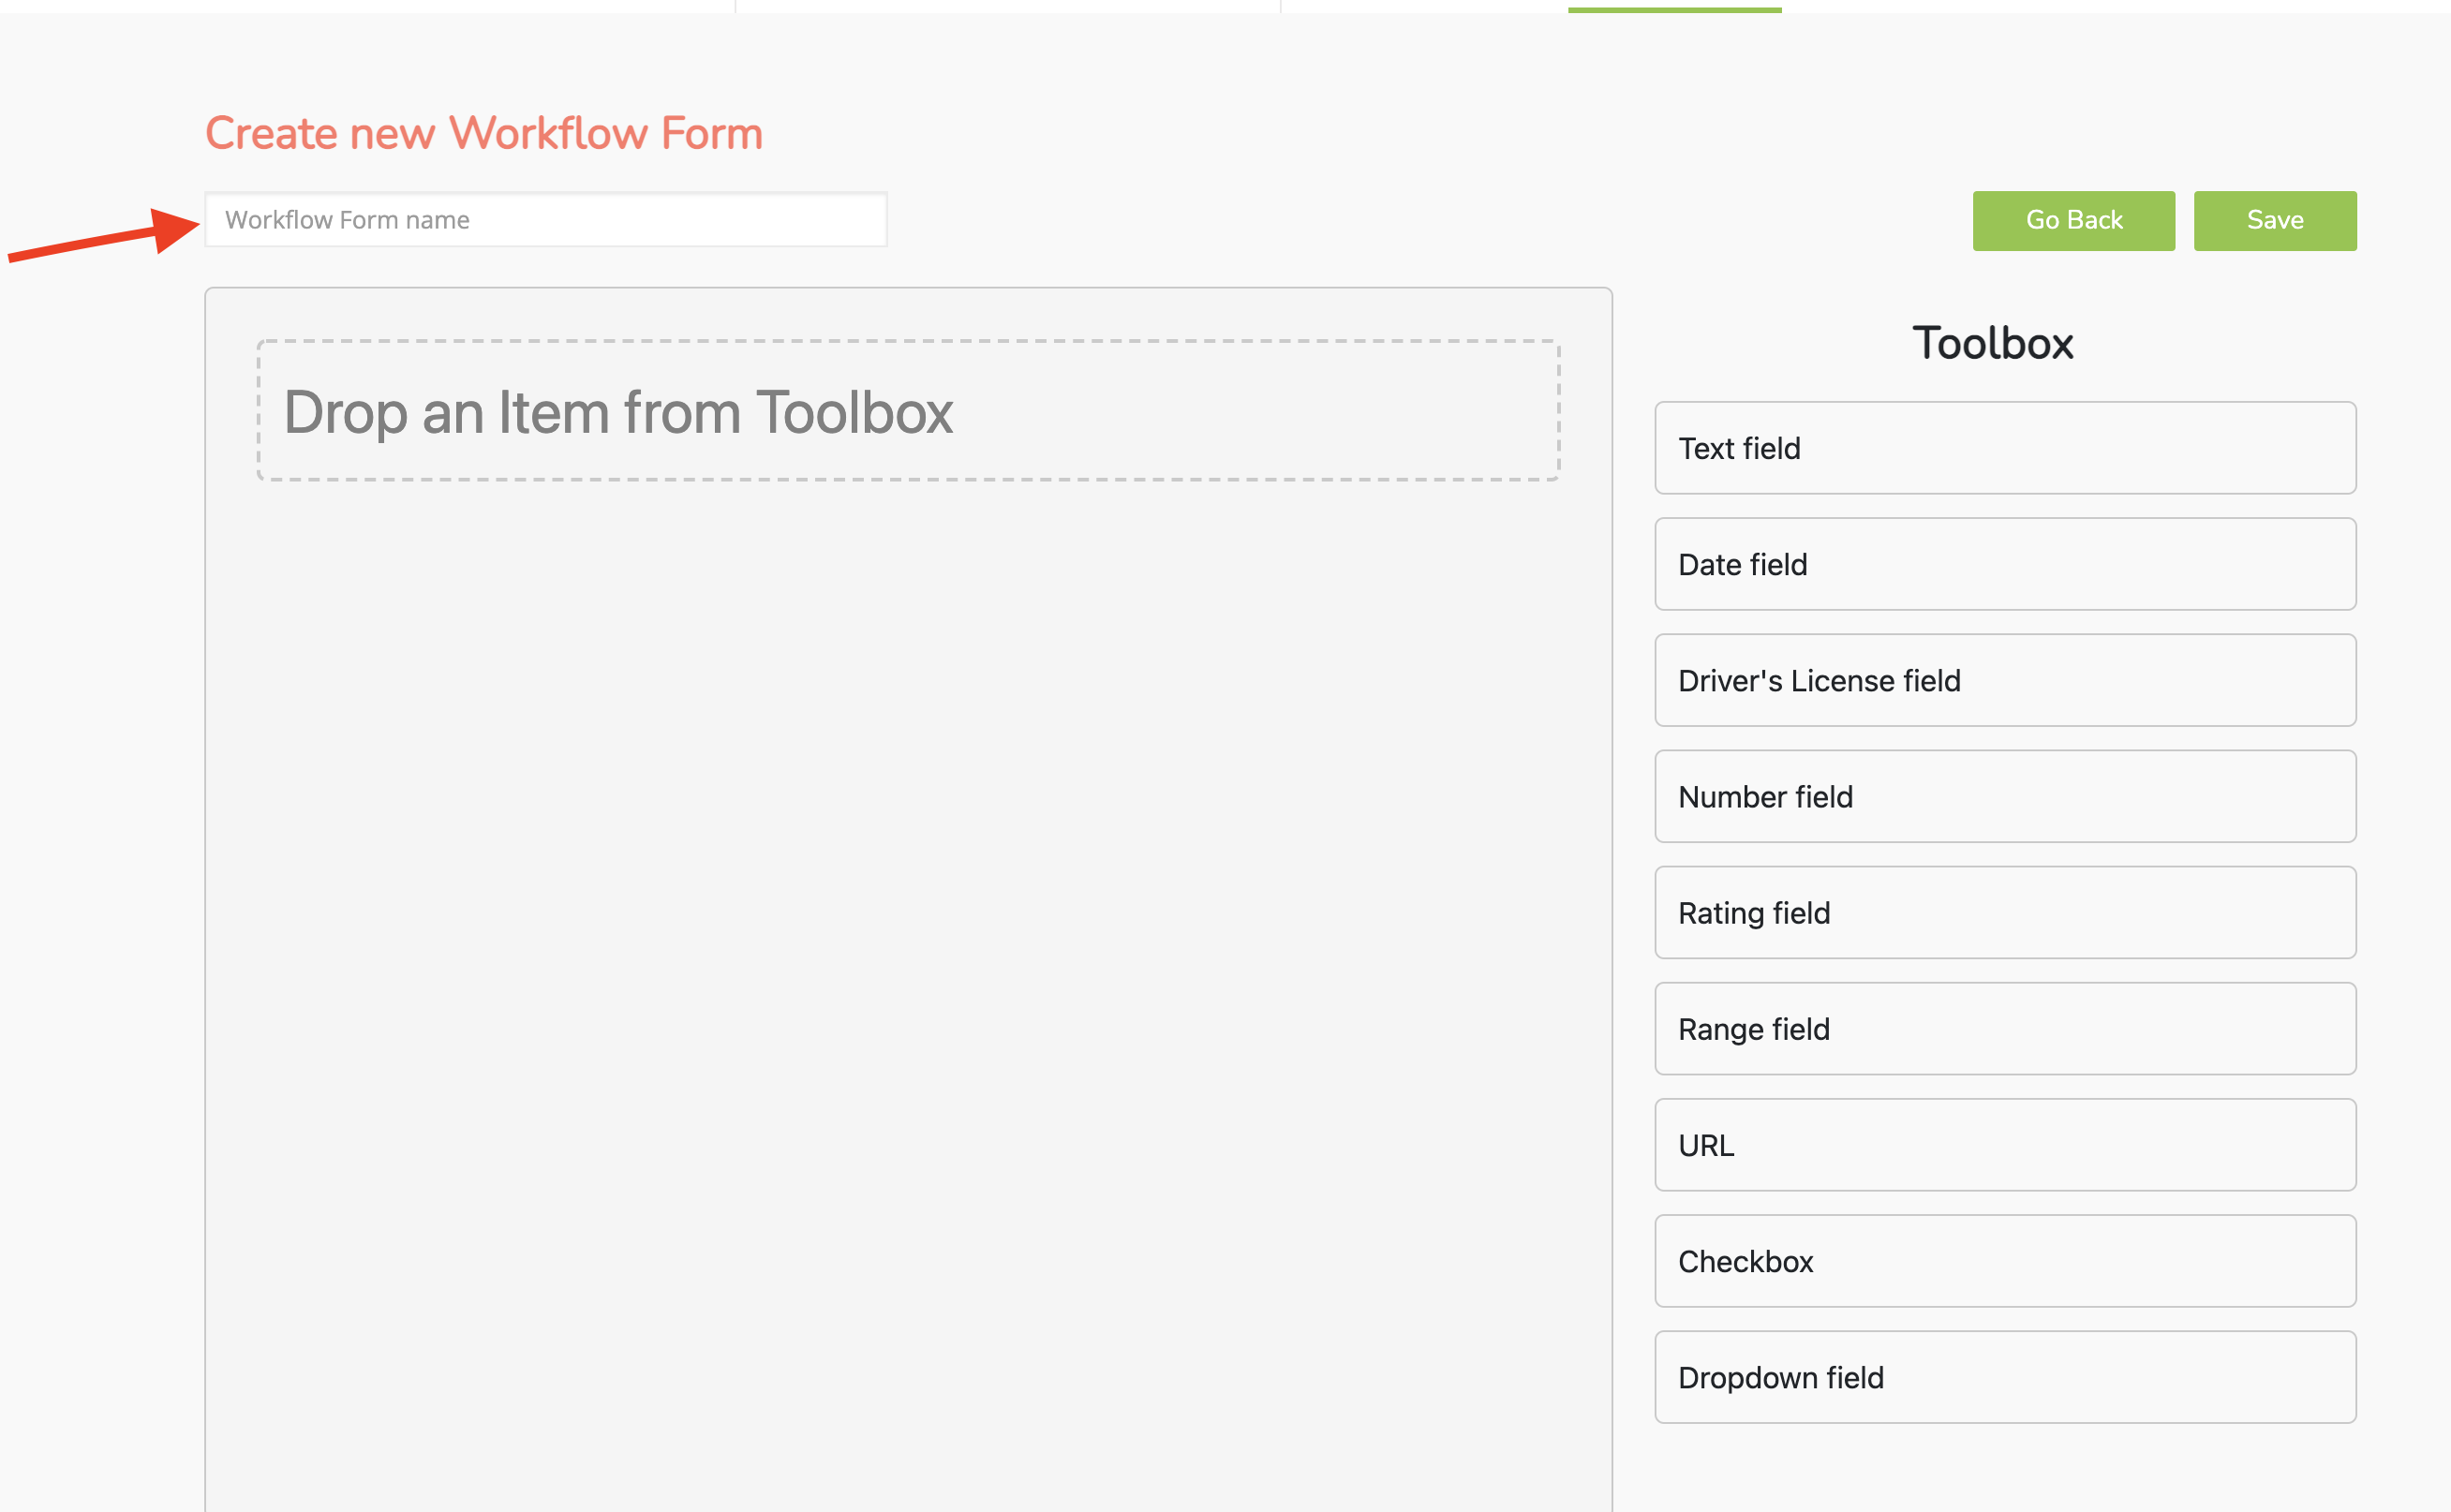
11. Select and drag items from the Toolbox section and drop it in the workflow section. Don't forget to click on "Save".
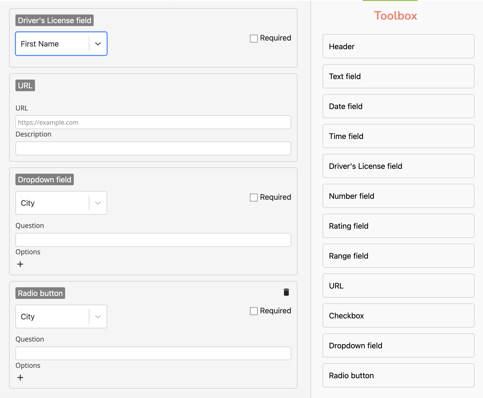
See examples images below: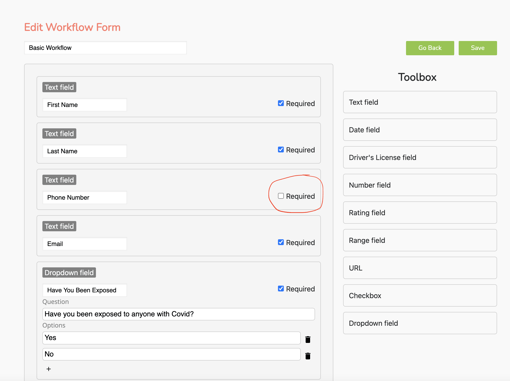
Important notes:
- If you don't want a particular question to be required during check-in, uncheck "Required" next to the question. The question will be optional for the visitor during the check-in process.
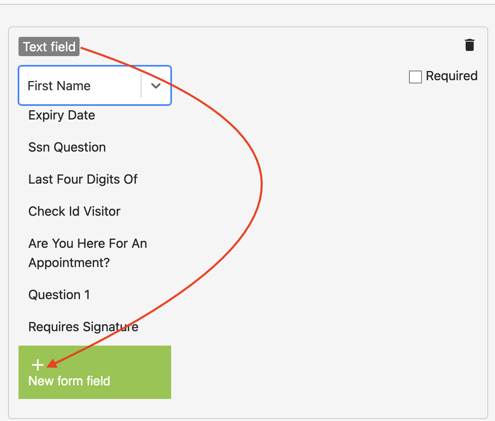
- You can change the order of the questions by selecting the block and moving it to the appropriate location.
- Need to delete an item? Click on the trash can symbol next to the item.
12. Select and drag the item from the Toolbox section and click on "Save"
Example: Dropdown field- Enter your dropdown questions and responses.
13. Select your next blocks from the "Action Blocks" section and drag them to the pane one by one. Make sure each block is connected to each in the order you want. For example: Employee lookup, print badge, send notification, take photo, etc.
Workflow blocks example:
- Employee lookup block- During the check-in, a visitor will have the option to look up the employee they are visiting, or they will have to type in the first letters of the employee's first name if "Hide employee until search" is checked.
- Send notification block- Visitor notification will be sent to the employee/host or the predetermined employee if this field is selected.
- Send text block- A customized check-in text is sent to the visitor during or after check-in is complete.
- Click here to see a complete list of the Workflow Action Blocks
14. Drag the "Check-in visitor from the "End Blocks" section and drag it to the pane and connect it to your last block. Add your customize message for the visitor and click on "Save".
Important notes:
- The workflow fields questions (Example: Name, email address, phone number, custom Covid questions, etc.) inside the custom form block will populate during the visitor's check-in, followed by any other blocks you add in your workflow.
- You can't connect any of the End Blocks in between any of the other blocks. All end blocks must be used last.
- Your workflow will not save unless you connect an end block at the end of your workflow.
- You can Only select one End block for each pane row.
- When connecting your blocks:
- Connect the block from the right side to the left side of the next block.
- Make sure each arrow connecting the blocks is flowing to the right --->

15. Click on "Publish" and you're done.
Make sure you reload the app on your device so your changes will show immediately.
All done.
Great job! 😆👍
Still, need help? It's okay. We are here to help you. Email us any day, anytime at success@greetly.com