Thanks for choosing Greetly by OfficeSpace as your visitor management system. Below are the steps to set up the Greetly Digital Receptionist
Note: These instructions assume you are running at least iOS 12. If you are using an older iPad, most setup steps still apply although you may find options in different places.
- Setup Wifi. As a cloud-based visitor management system, Greetly lives off of Wifi, so use the strongest network at the physical location where the iPad will be placed. From the iPad's home screen. Tap Settings > Wi-Fi.
- Update iOS. Tap Settings > General > Software Updates. While you are there, toggle OFF automatic iOS updates. Otherwise, the iPad may shut itself down when an important visitor arrives.
- Turn off iOS and App Auto-Updates. This is an optional step, but we recommend it so the device's operating system and Greetly software do not update in the background and then close, leaving your reception area unattended. Tap Settings > General > Software Update> Toggle off "Install iPadOS Updates".
- Mute the Volume. Tap Settings > Sounds. Move Ringer and Alerts to mute. Lower on the screen toggle Keyboard Clicks to OFF.
- Setup Guided Access. Guided Access is a feature that allows you to lock the iPad into your Greetly digital receptionist app. Tap Settings > General > Accessibility > Guided Access. Set your passcode settings.
- Greetly Recommends always running your visitor registration app in kiosk mode. For users running Greetly on an Apple iPad, that means using the built-in Guided Access feature. This ensures your check-in app is always working smoothly.
- From the iPad's home screen, tap Settings > General > Accessibility > Guided Access
- Toggle Mirror Display Auto-Lock ON
- Adjust keyboard settings. Setting > General > Keyboard. Turn off everything except auto-capitalization and enable key flicks.
- Turn off auto spell correct (optional)
a. On the Home screen of your device, tap Settings, then tap General.
b. Tap Keyboard, then turn off Auto-Correction.
- Display & Brightness.
- Raise the brightness to the maximum.
- Turn Auto-Lock to Never.
- (Optional) If your lobby has off-hours, tap Night Shift and set hours for the screen to be dimmed.
- Visitor Entry Field to Input Information. Make sure the entry field sections (ie: Name, email address, company name, phone number, etc.) on your iPad isn't too light for your visitors to see when they check-in. Click here to review our knowledge base article.
- Change Privacy Settings. This vital step maximizes Wifi connectivity. From the iPad's home screen tap Settings > Privacy > Location Services > System Services > toggle Wi-Fi Networking to off.
- Turn Off Bluetooth. If you won't be using visitor badge printing over Bluetooth, go to Settings > Bluetooth, and toggle to OFF.
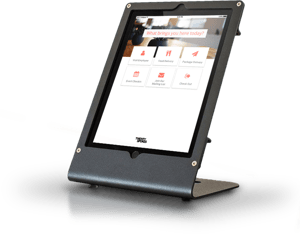
- Install the Greetly app from the App Store. Make sure to install "Greetly Digital Receptionist" and not a legacy version of our visitor management software.
- Tap the Greetly Icon to Launch the App. You'll be prompted at this point to grant Greetly permission to use the camera--please do so.
- Log in to the App with Your 5-Digit Code. Click here to see how to locate your pin code.
- Launch Guided Access by quickly tapping the iPad's home button 3 times.
- Test Greetly. Run through the visit employee user flow once or twice.
Questions? Email success@greetly.com and someone friendly will provide the assistance you need.